
Introduction
You built an API with Express and node index.js works on your laptop. Now you want it online, with HTTPS, without renting a server, setting up Nginx and PM2, or writing a Dockerfile.
Kubana App Platform does that. You point it at a GitHub repository, Kubana installs your packages, starts your app with npm start, and gives you a public HTTPS address. The only thing your code must do is listen on the port Kubana gives it, which is one line.
At a glance
- Time: about ten minutes for the first deploy.
- You need: a Kubana account with App Platform access, an Express app on GitHub, and a few dollars of credit.
- You get: your API at
https://<your-app>.platform.kubana.app, rebuilt on every push if you want, with build logs, live logs and one-click rollbacks.- You don't need: a Dockerfile, a server, Nginx or PM2.
Part 1 takes you to a live URL in seven steps. Part 2 covers cron jobs, deploy on push and your own domain. Part 3 shows how to do it all by asking your AI assistant.
Note: App Platform is in early access. If you don't see it in the dashboard, open App Platform and choose Request early access.
Before you start
You need:
- A Kubana Cloud account with App Platform access.
- A project in the dashboard to hold the app (Projects → New project if you have none).
- Enough credit for the size you pick. Before the first deploy, your balance must cover 72 hours of that size. The dashboard shows the exact amount (for the Small size it is well under a dollar).
- An Express app in a GitHub repository, public or private, with
package.jsonat the root.
Make your app ready (two small checks)
1. Listen on process.env.PORT. Kubana tells your app which port to use through the PORT variable. Use it, and keep a fallback for your computer:
const express = require('express')

const app = express()

app.get('/', (req, res) => {
  res.json({ message: 'Hello from Kubana App Platform!' })
})

app.get('/health', (req, res) => {
  res.json({ status: 'ok' })
})

const port = process.env.PORT || 3000
app.listen(port, () => {
  console.log(`Listening on port ${port}`)
})
Don't hard-code a port such as app.listen(3000), and don't add your own PORT in Kubana's Environment tab: either one stops Kubana from reaching your app.
2. Have a start script in package.json. Kubana starts your app with it:
"scripts": {
  "start": "node index.js"
}
Using TypeScript? Add a build script too (for example "build": "tsc") and point start at the compiled file ("start": "node dist/index.js"). Kubana runs build before start when it exists.
Commit your lock file (package-lock.json, pnpm-lock.yaml or yarn.lock): Kubana installs with the matching package manager. To pin a Node.js version, set engines.node in package.json.
Part 1: From GitHub to a live URL
Step 1: Create the app
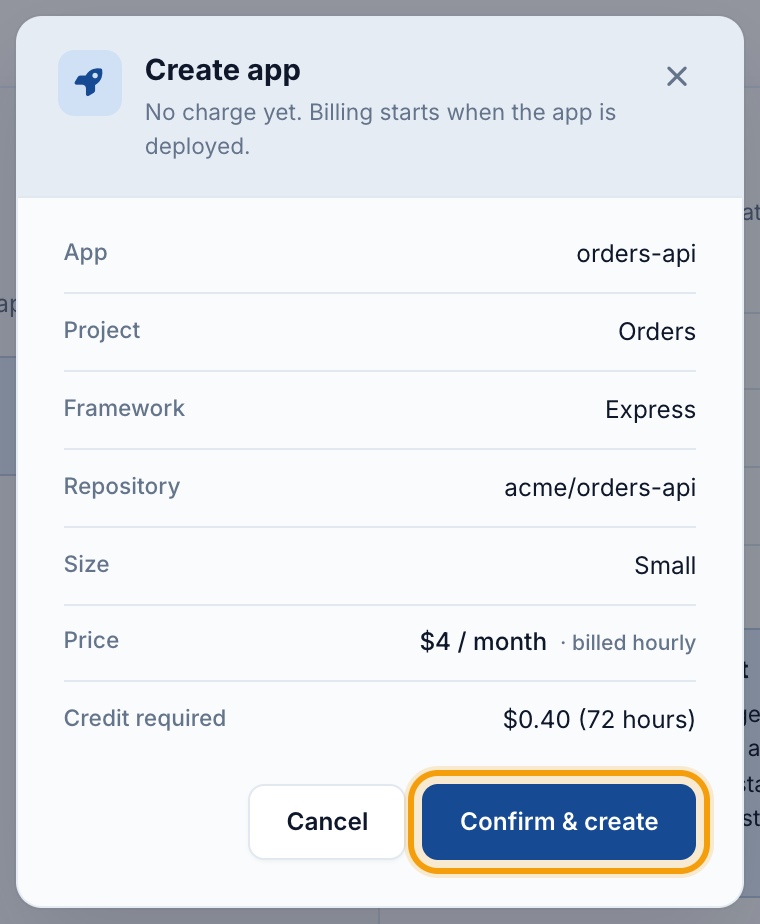
In the dashboard, open App Platform and choose New app.
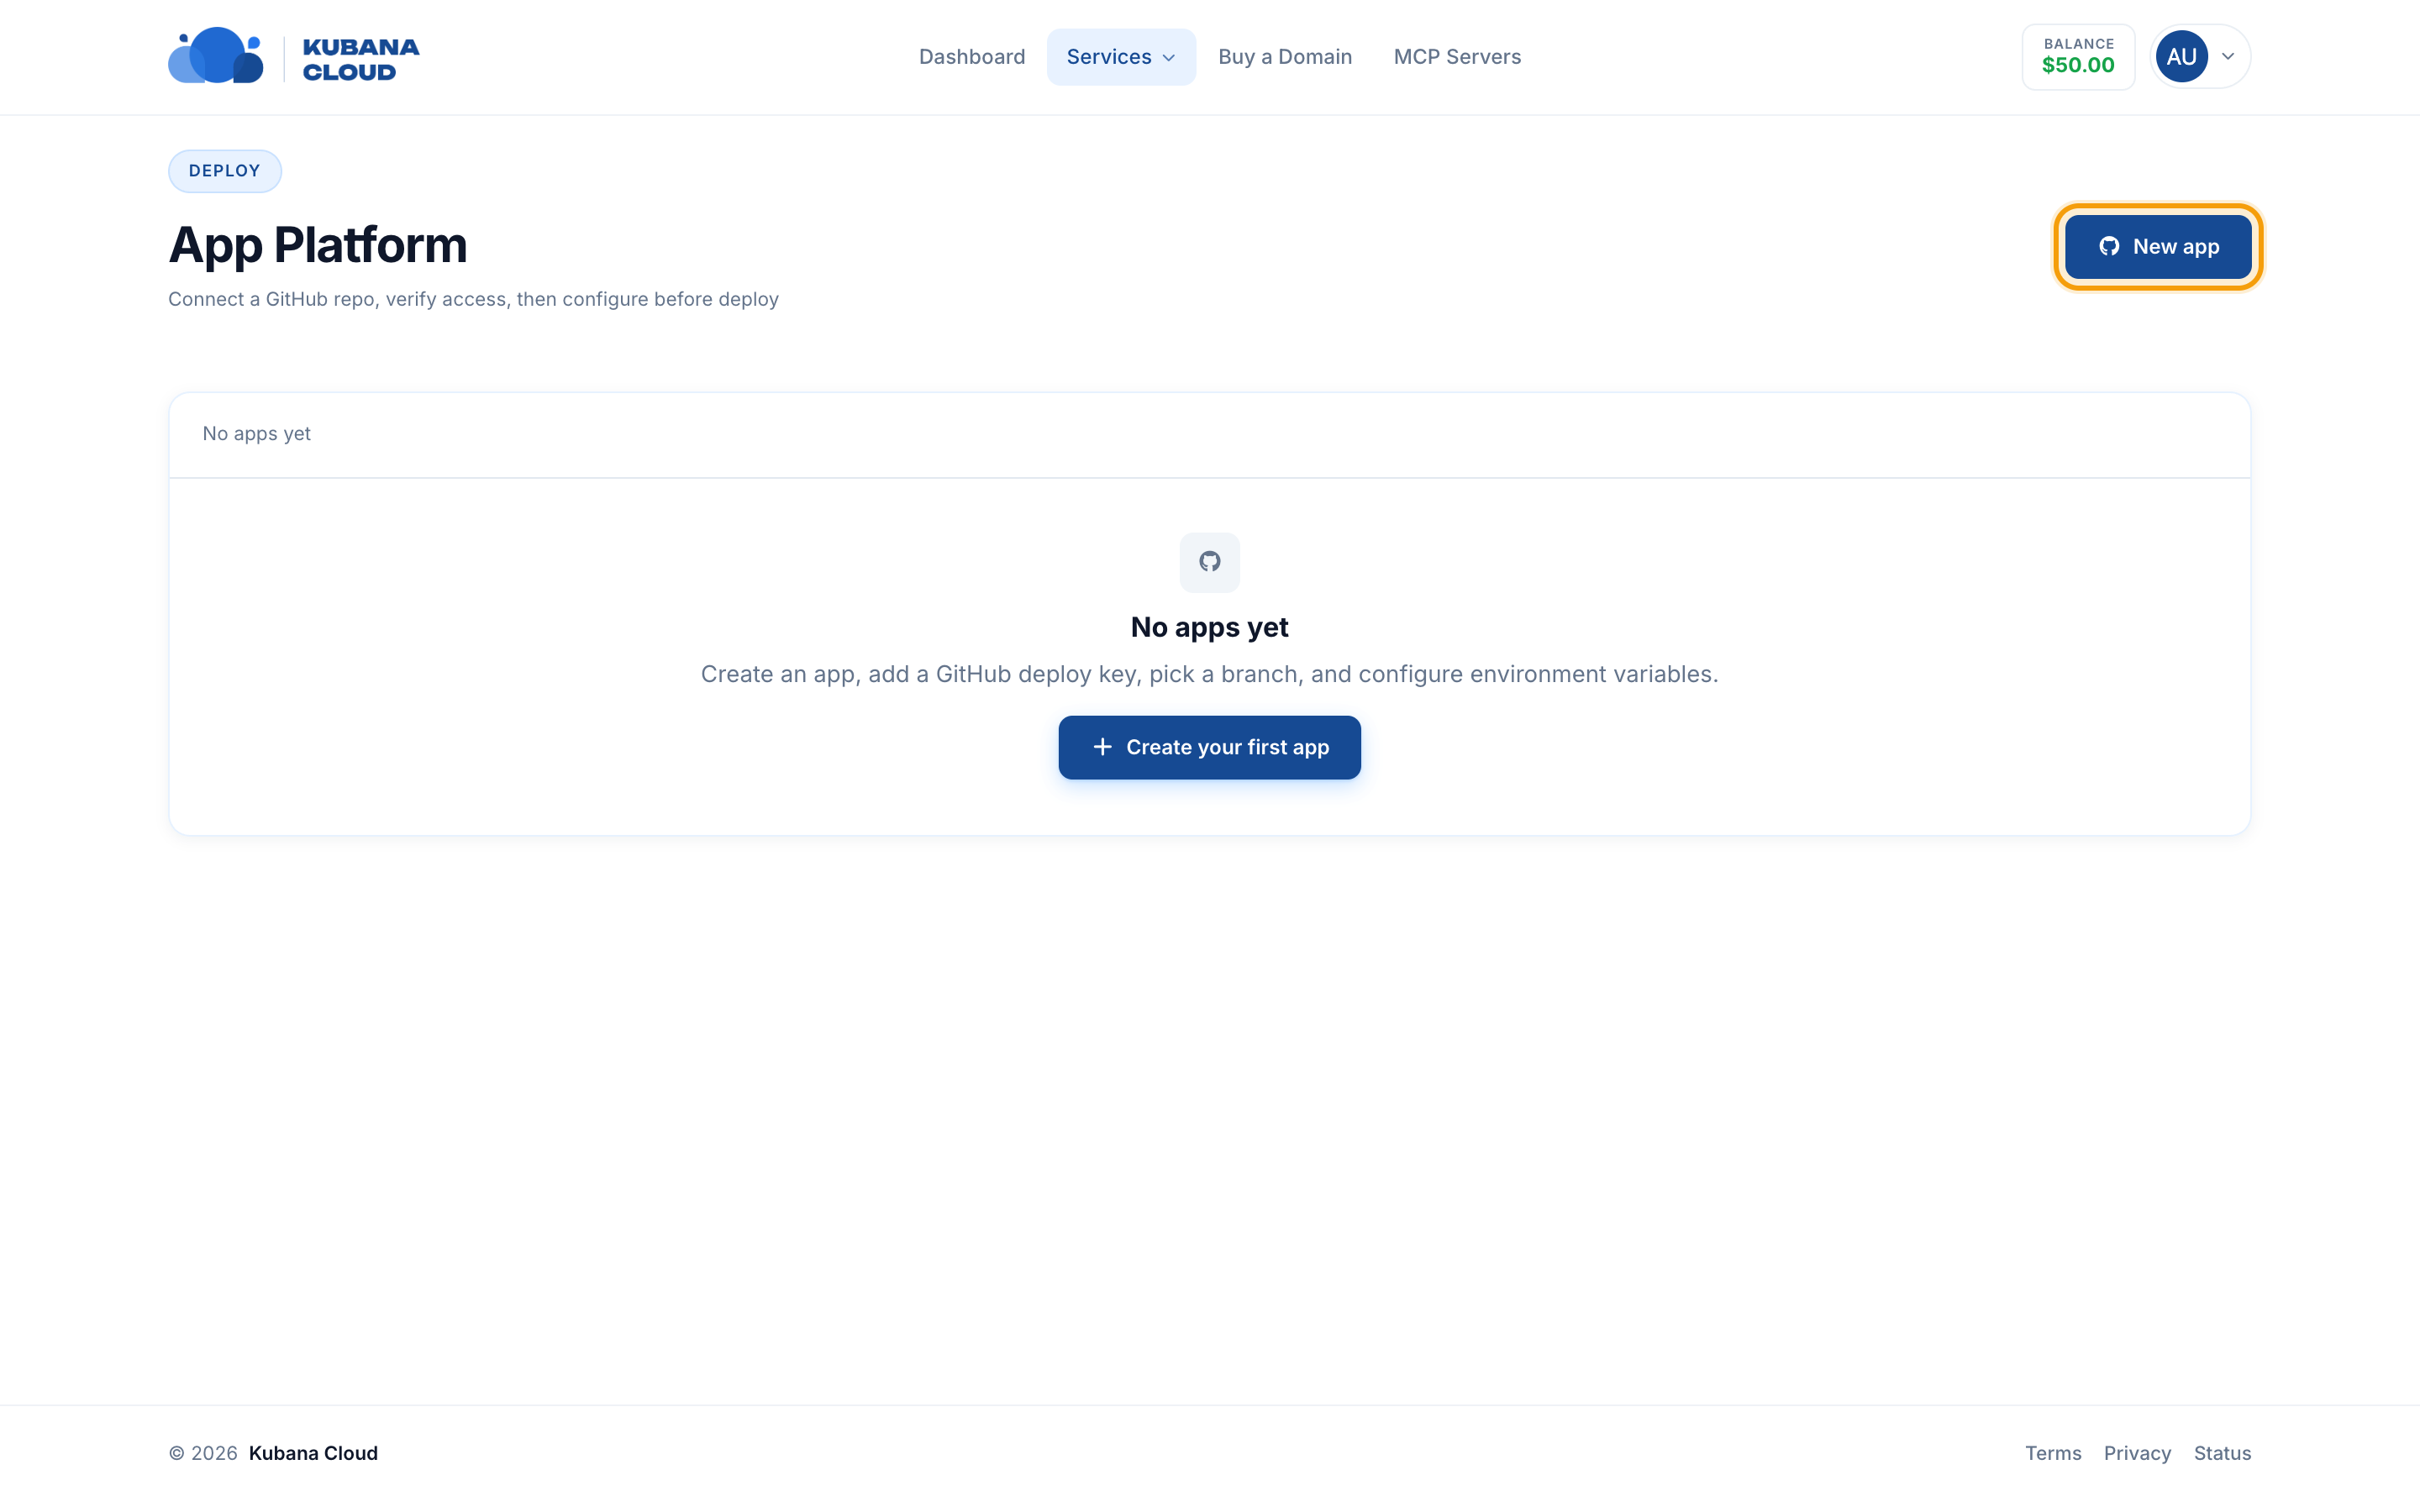
Fill in the form (the numbers match the screenshot):
- Project: the project the app belongs to.
- App name: a short name such as
orders-api. It becomes part of your address:orders-api.platform.kubana.app. - Framework: choose Backends,
- then Express.
- GitHub repository: paste
owner/repo, the HTTPS URL or the SSH URL. All three work. - App size: Small is plenty for most APIs, and you can pick a bigger size later.
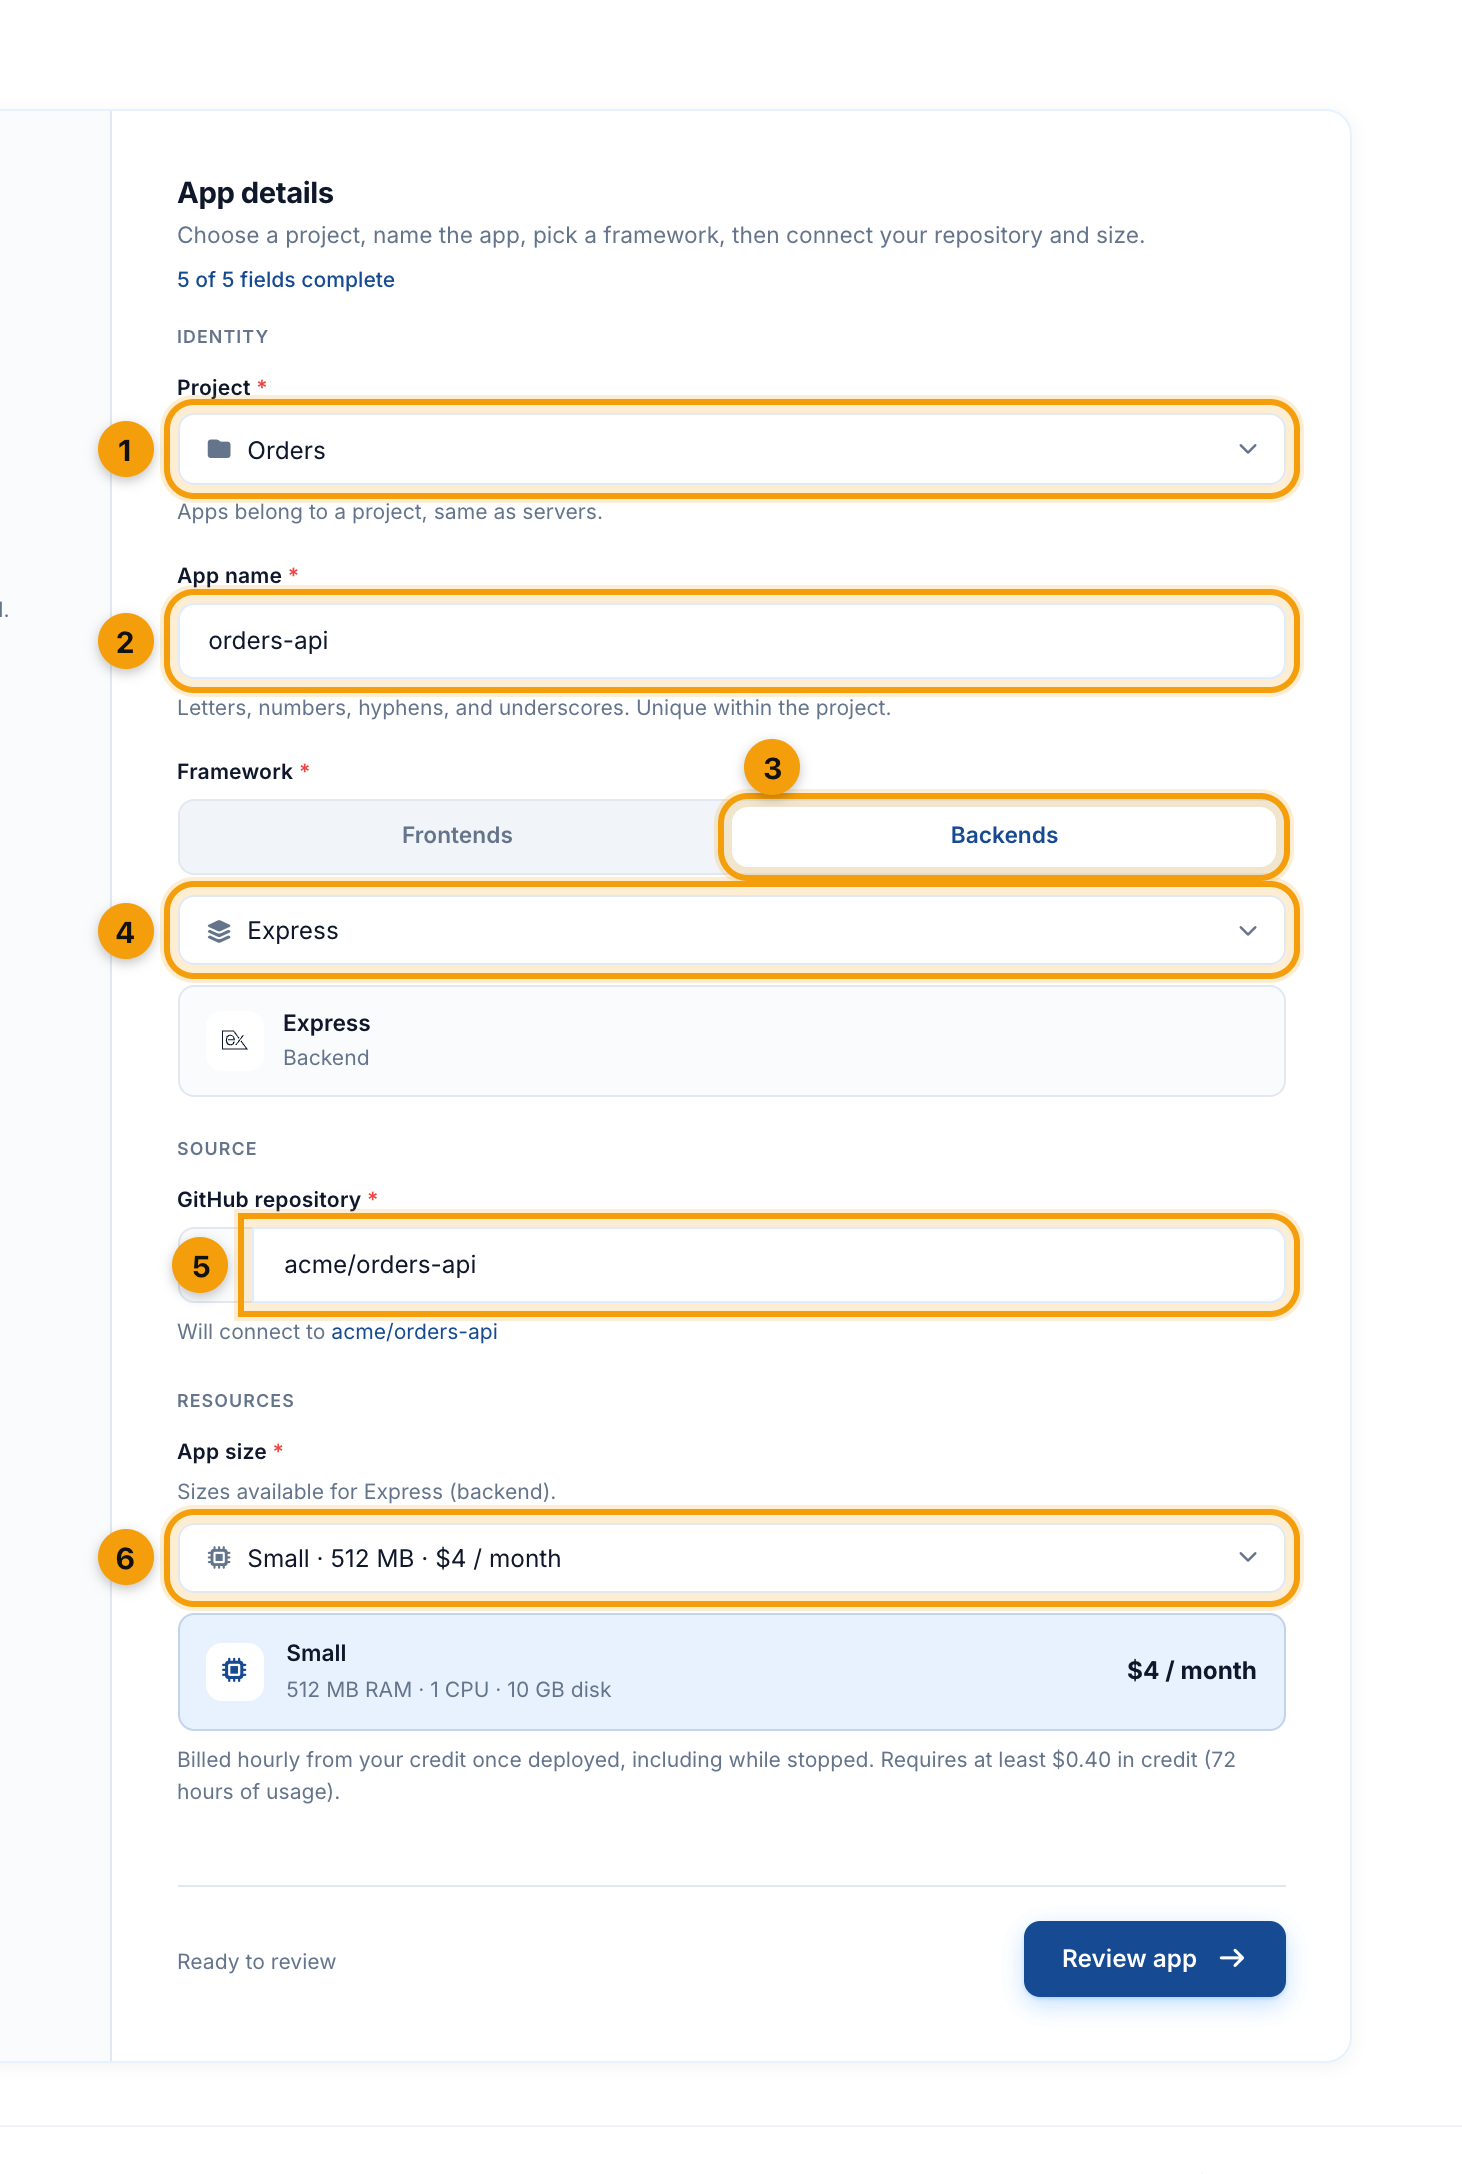
Choose Review app, check the summary, then Create app and Confirm & create. Nothing is billed yet: billing starts at the first deploy.
Step 2: Let Kubana read your repository
Kubana opens your new app on the Deploy key panel. A deploy key gives Kubana read-only access to this one repository: Kubana can clone your code but can never push to it.
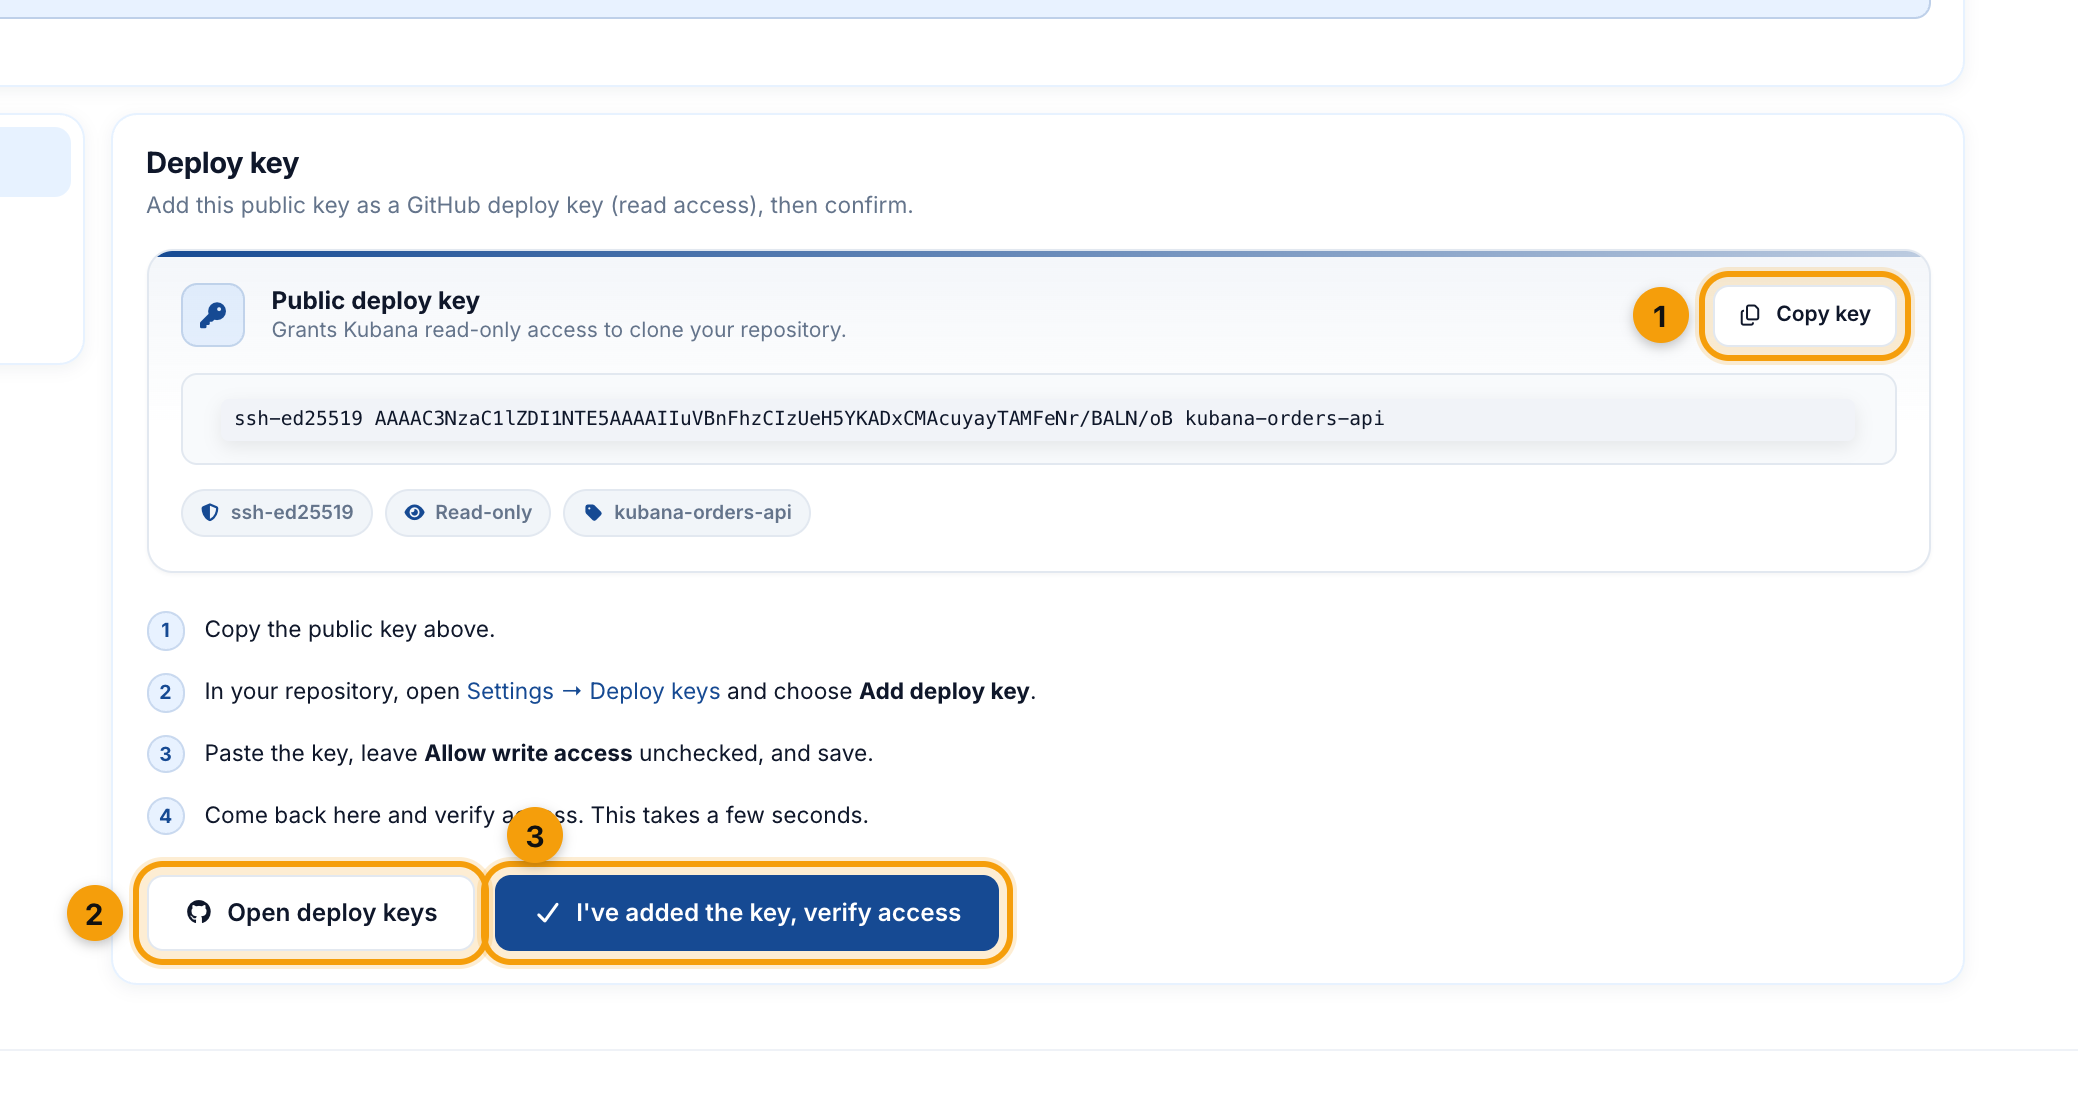
Choose Copy key (1).
Choose Open deploy keys (2). It opens your repository's Settings → Deploy keys page on GitHub. Choose Add deploy key.
Paste the key, give it a title such as
Kubana, and leave Allow write access unchecked. Save.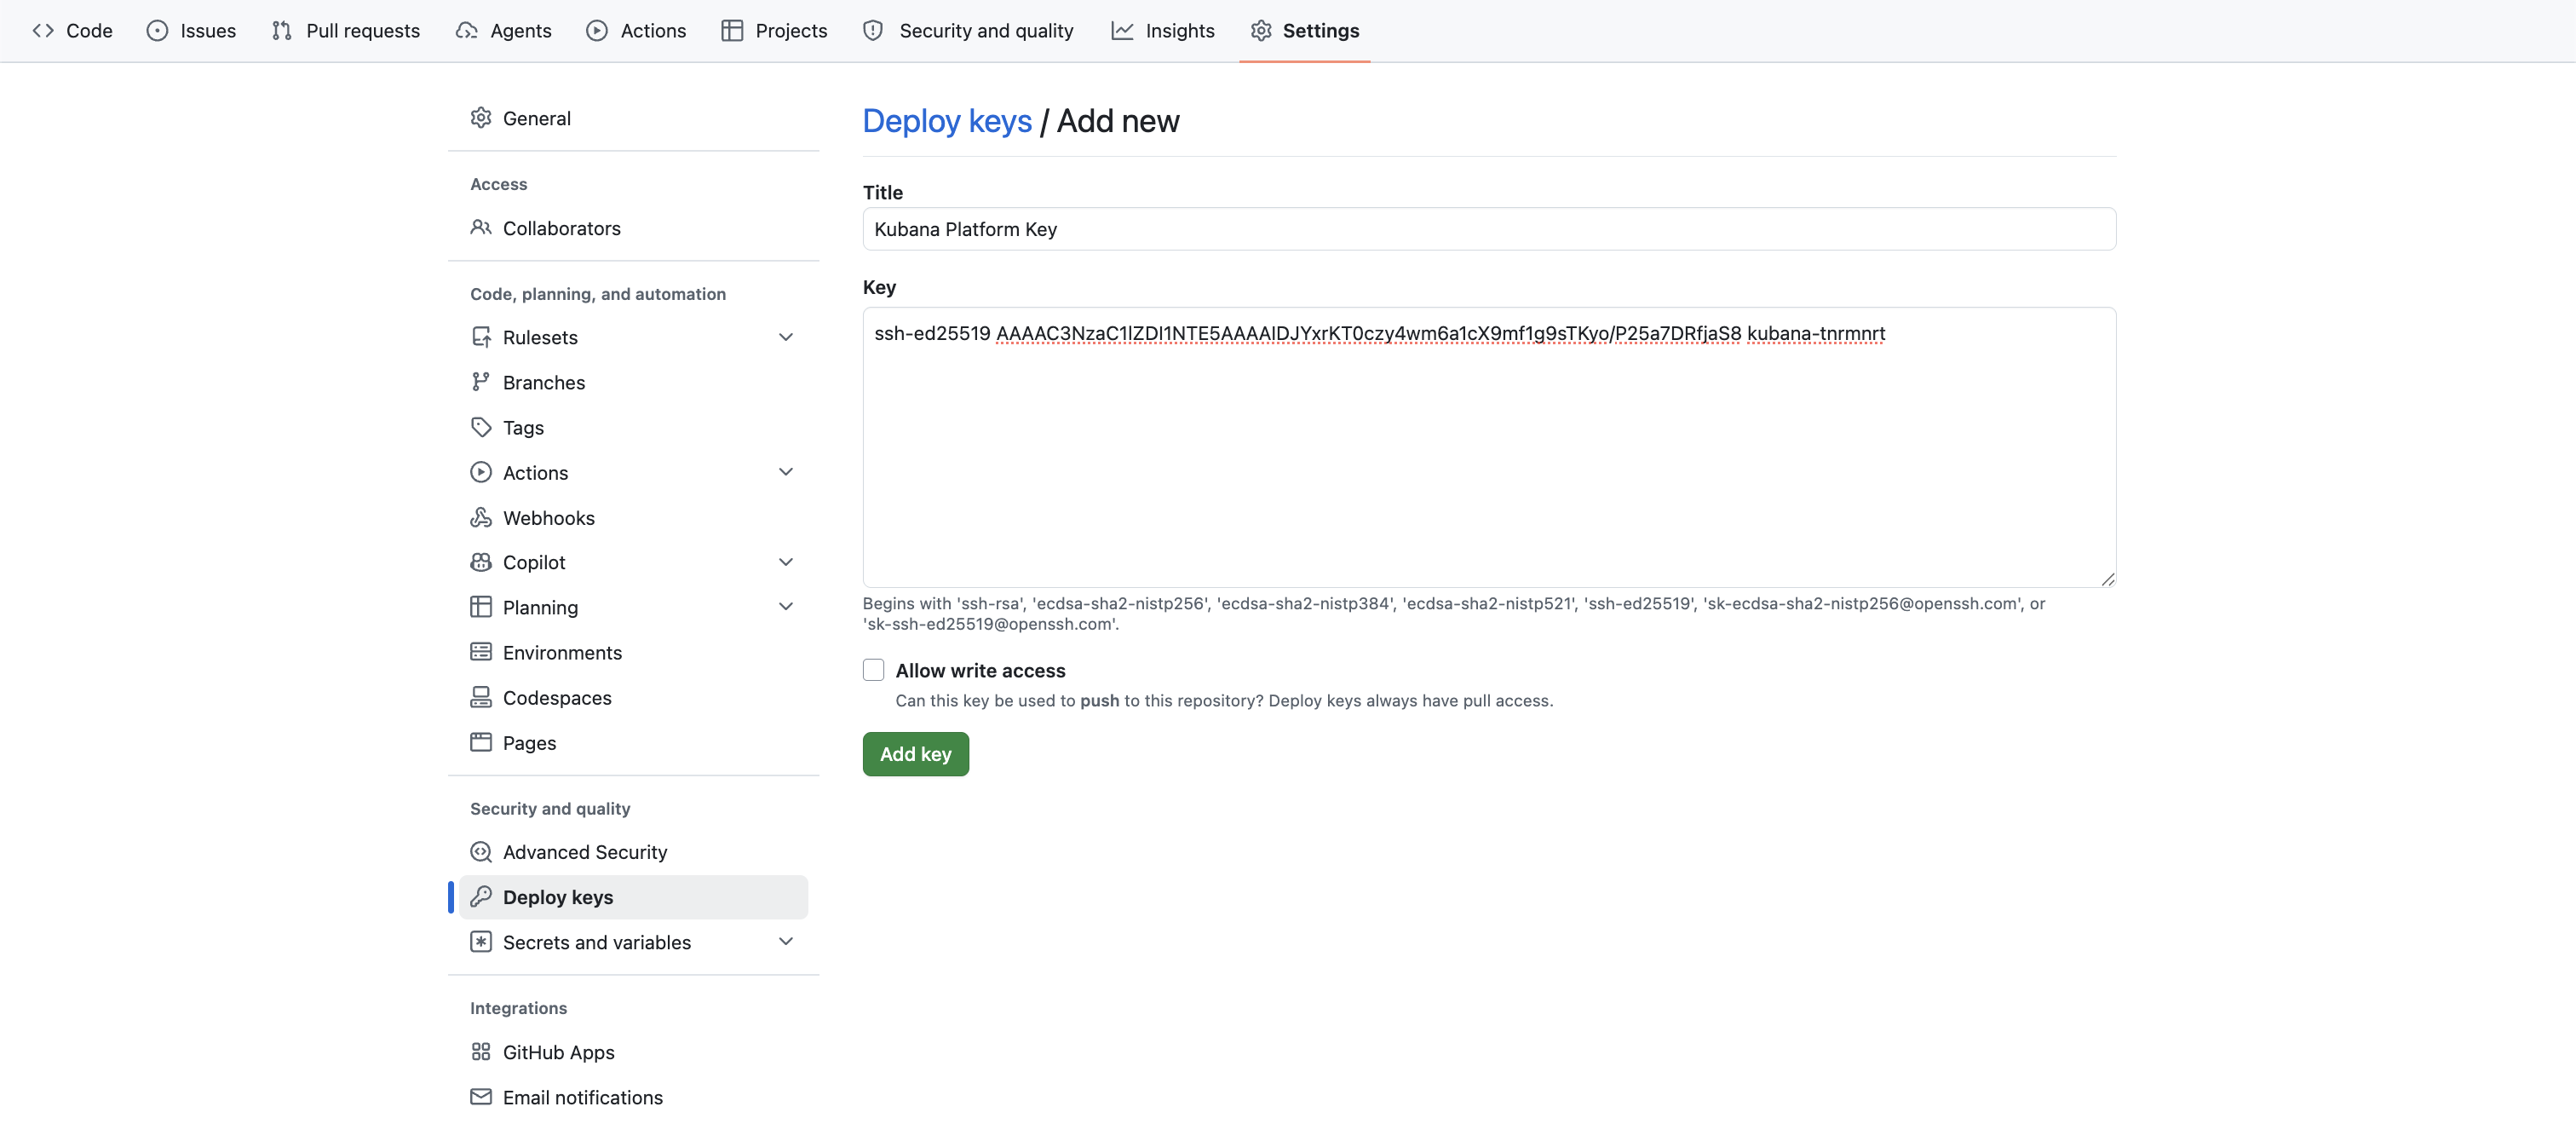
Back in Kubana, choose I've added the key, verify access (3).
After a few seconds the status changes to Ready, and the next thing to do shows up in the menu as Set branch · Required.
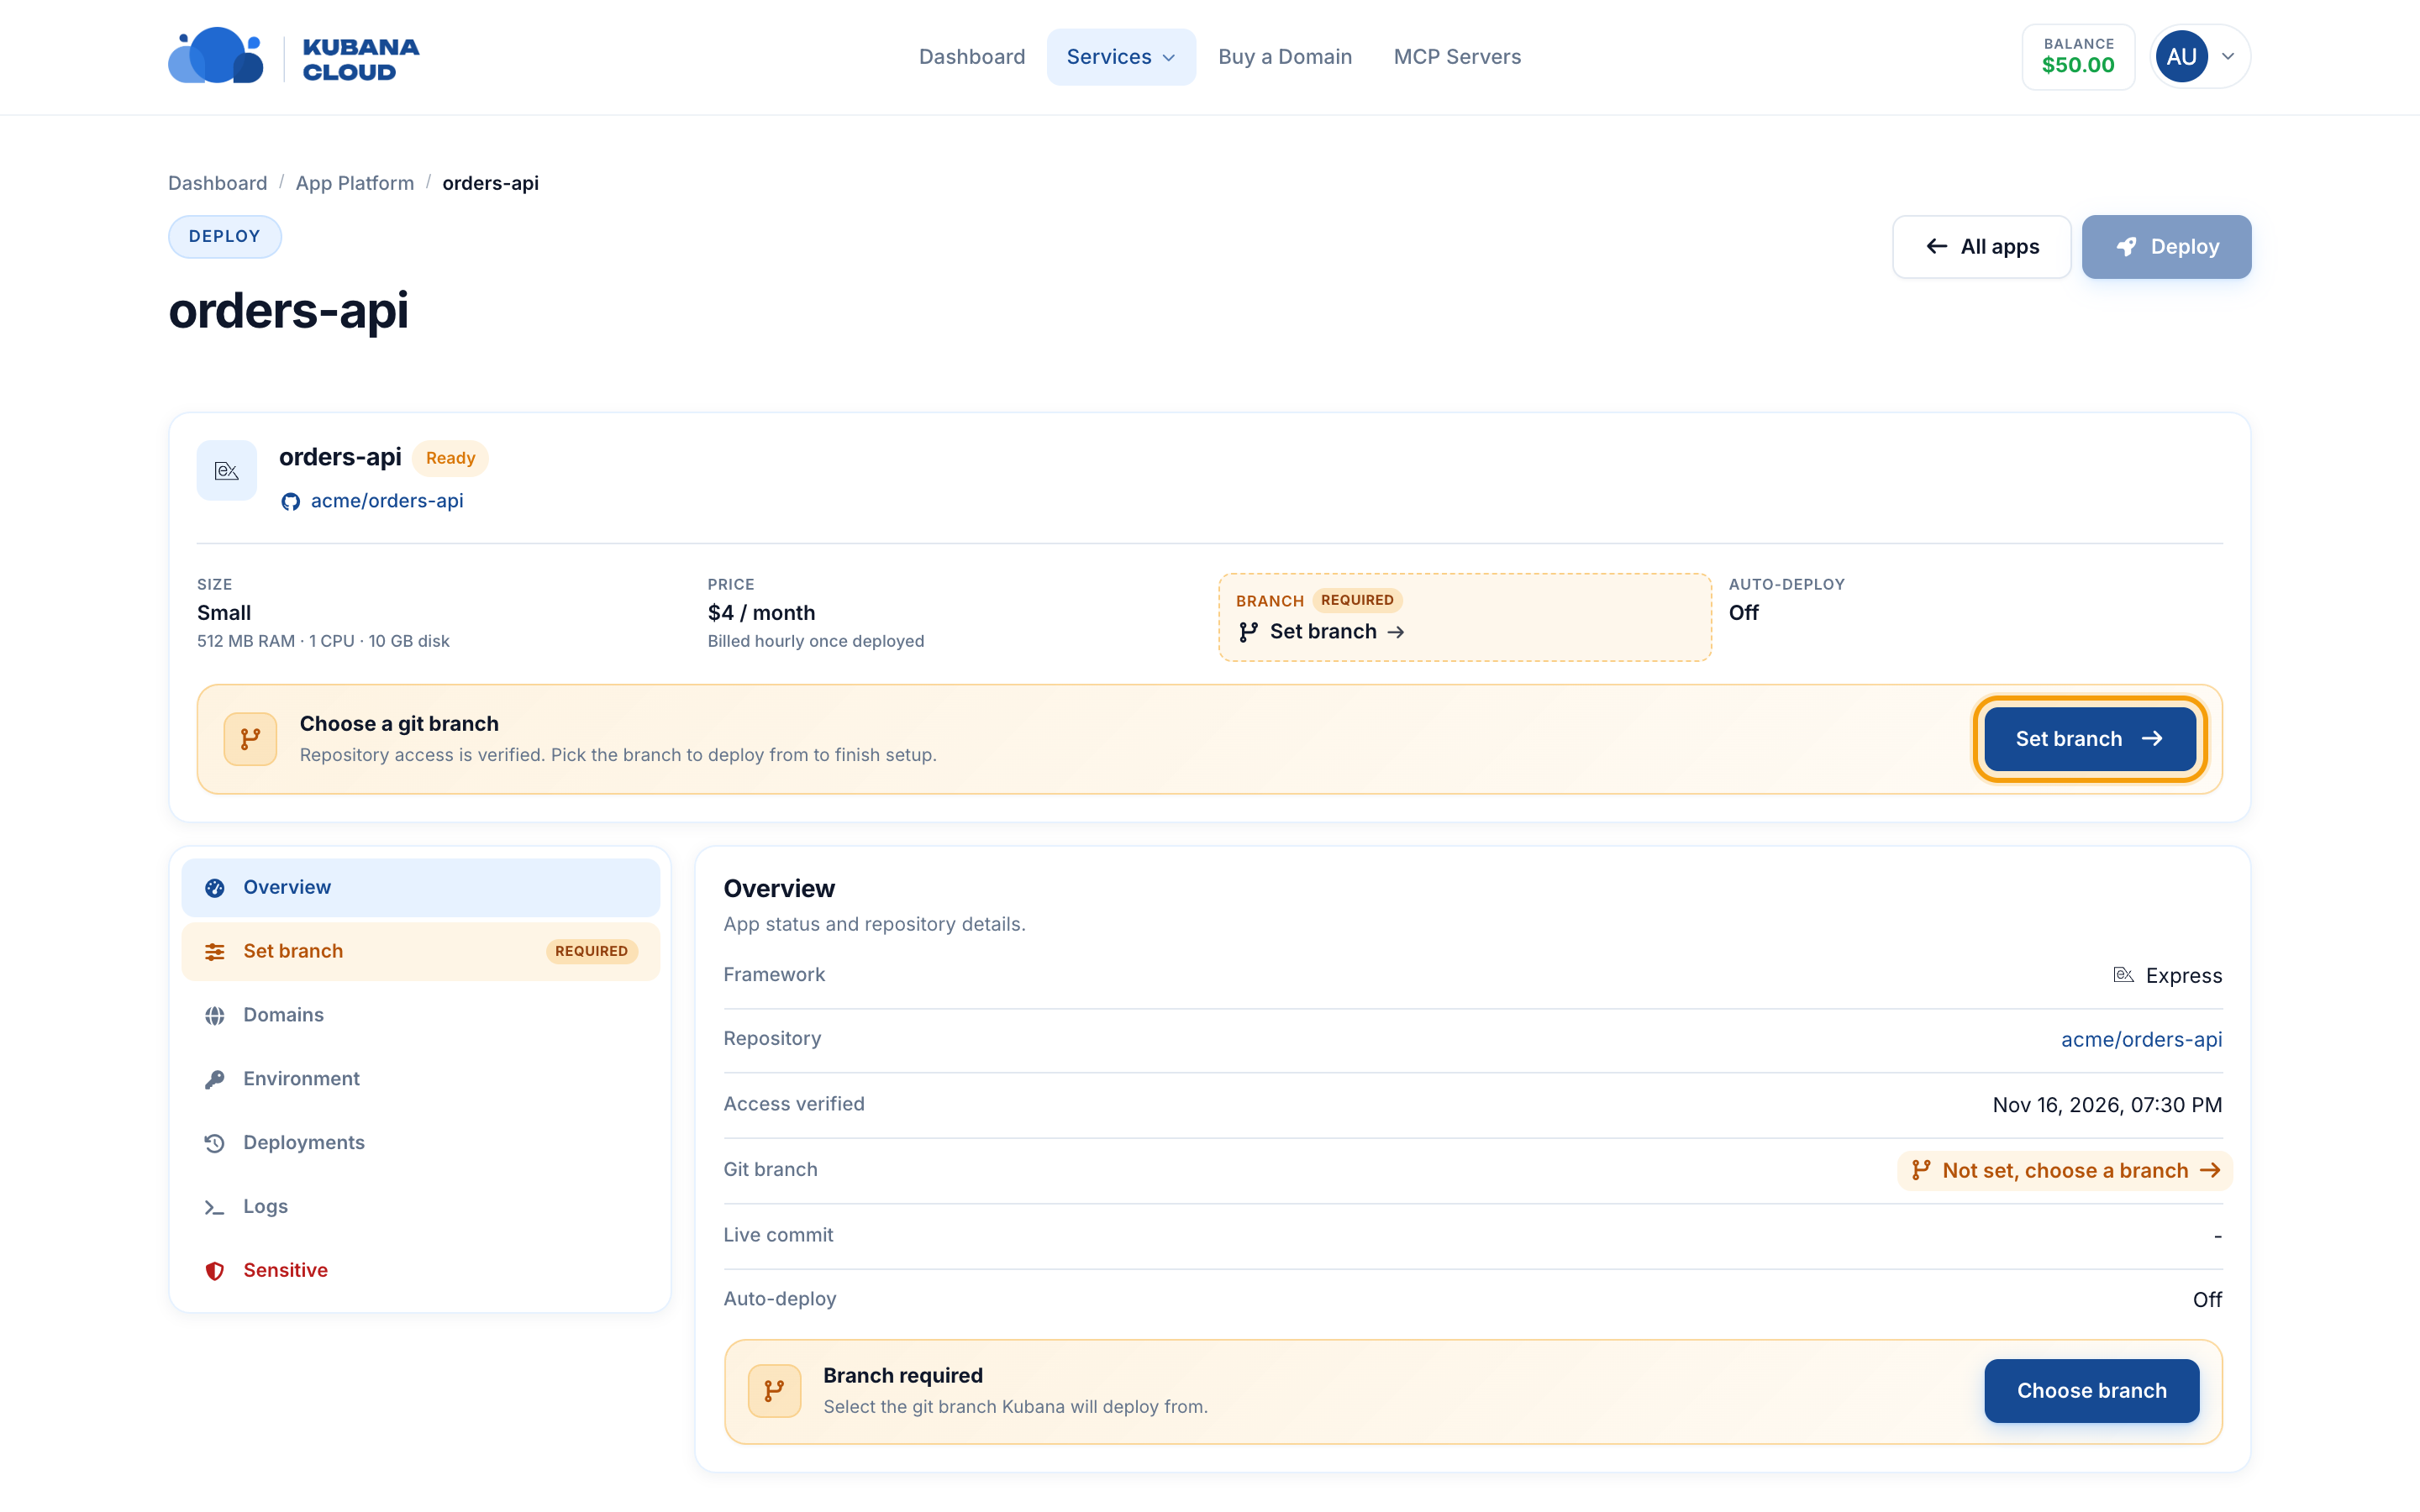
If verification fails: check that you added the key to the same repository you entered in Step 1 and that you saved it on GitHub. Read-only access is enough.
Step 3: Pick the branch to deploy
Open Set branch. Choose Load branches, select the branch Kubana should deploy (1, usually main) and choose Save branch (2).
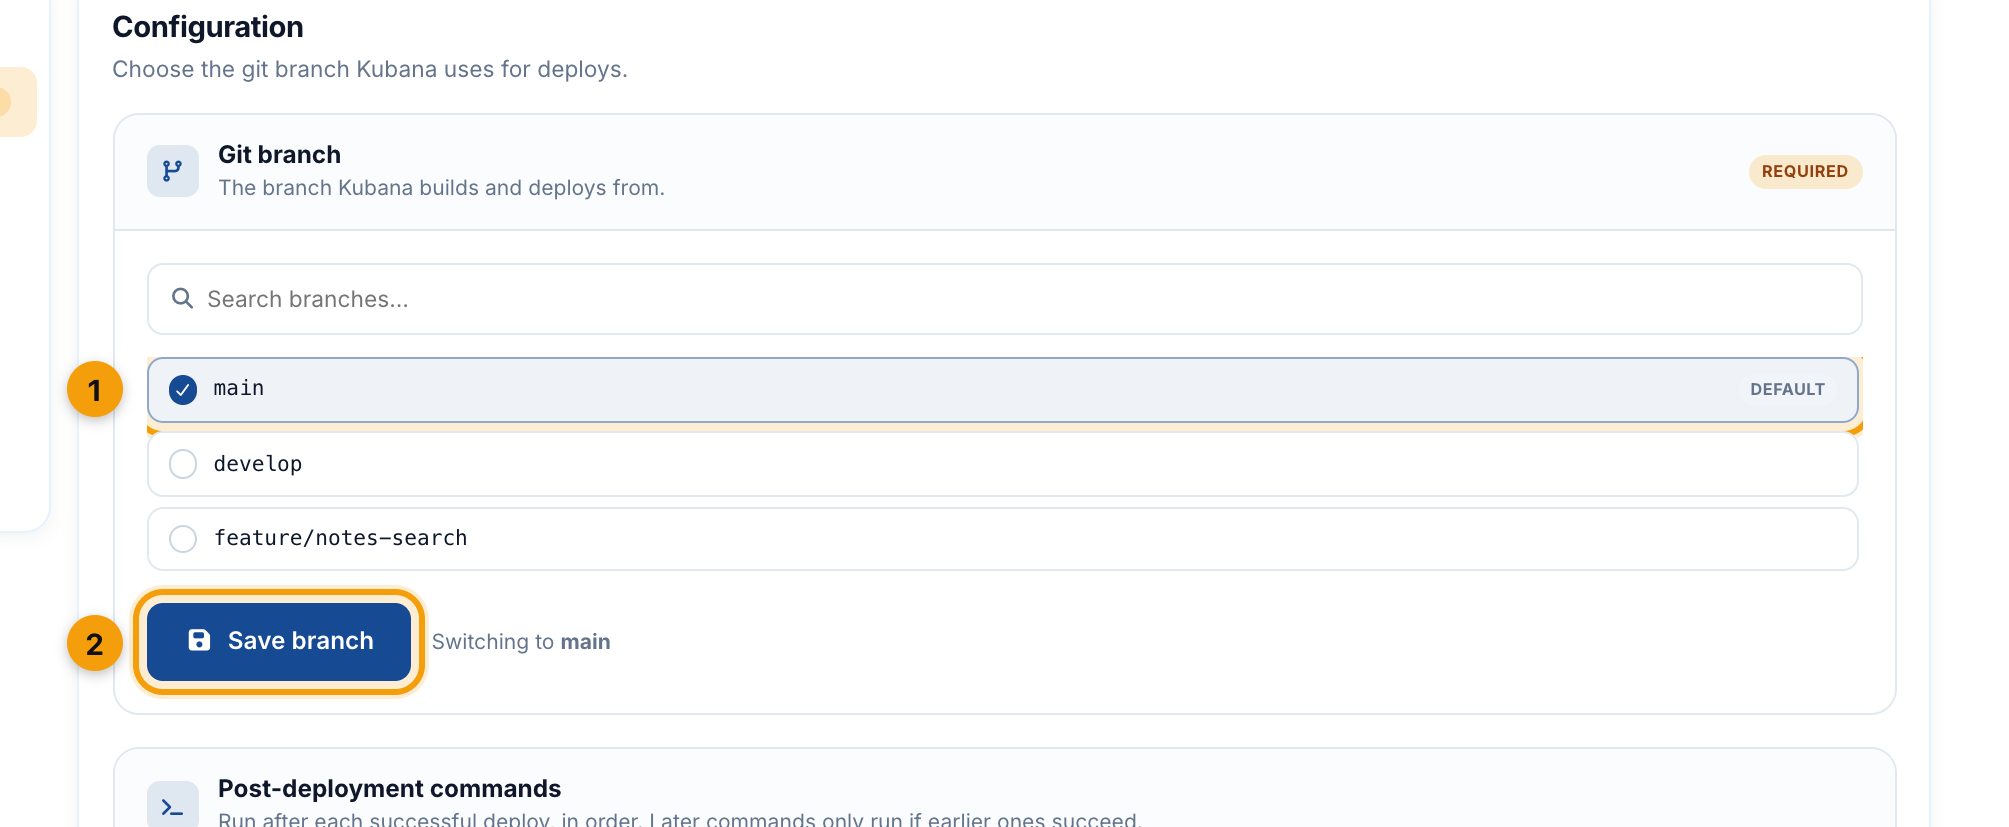
Kubana only deploys this branch. Pushes to other branches are ignored.
Step 4: Add your environment variables
Your settings and secrets belong in Environment, not in your repository or a committed .env file. Open Environment → Add variables → Paste .env, paste your production values (1), then create them (2):
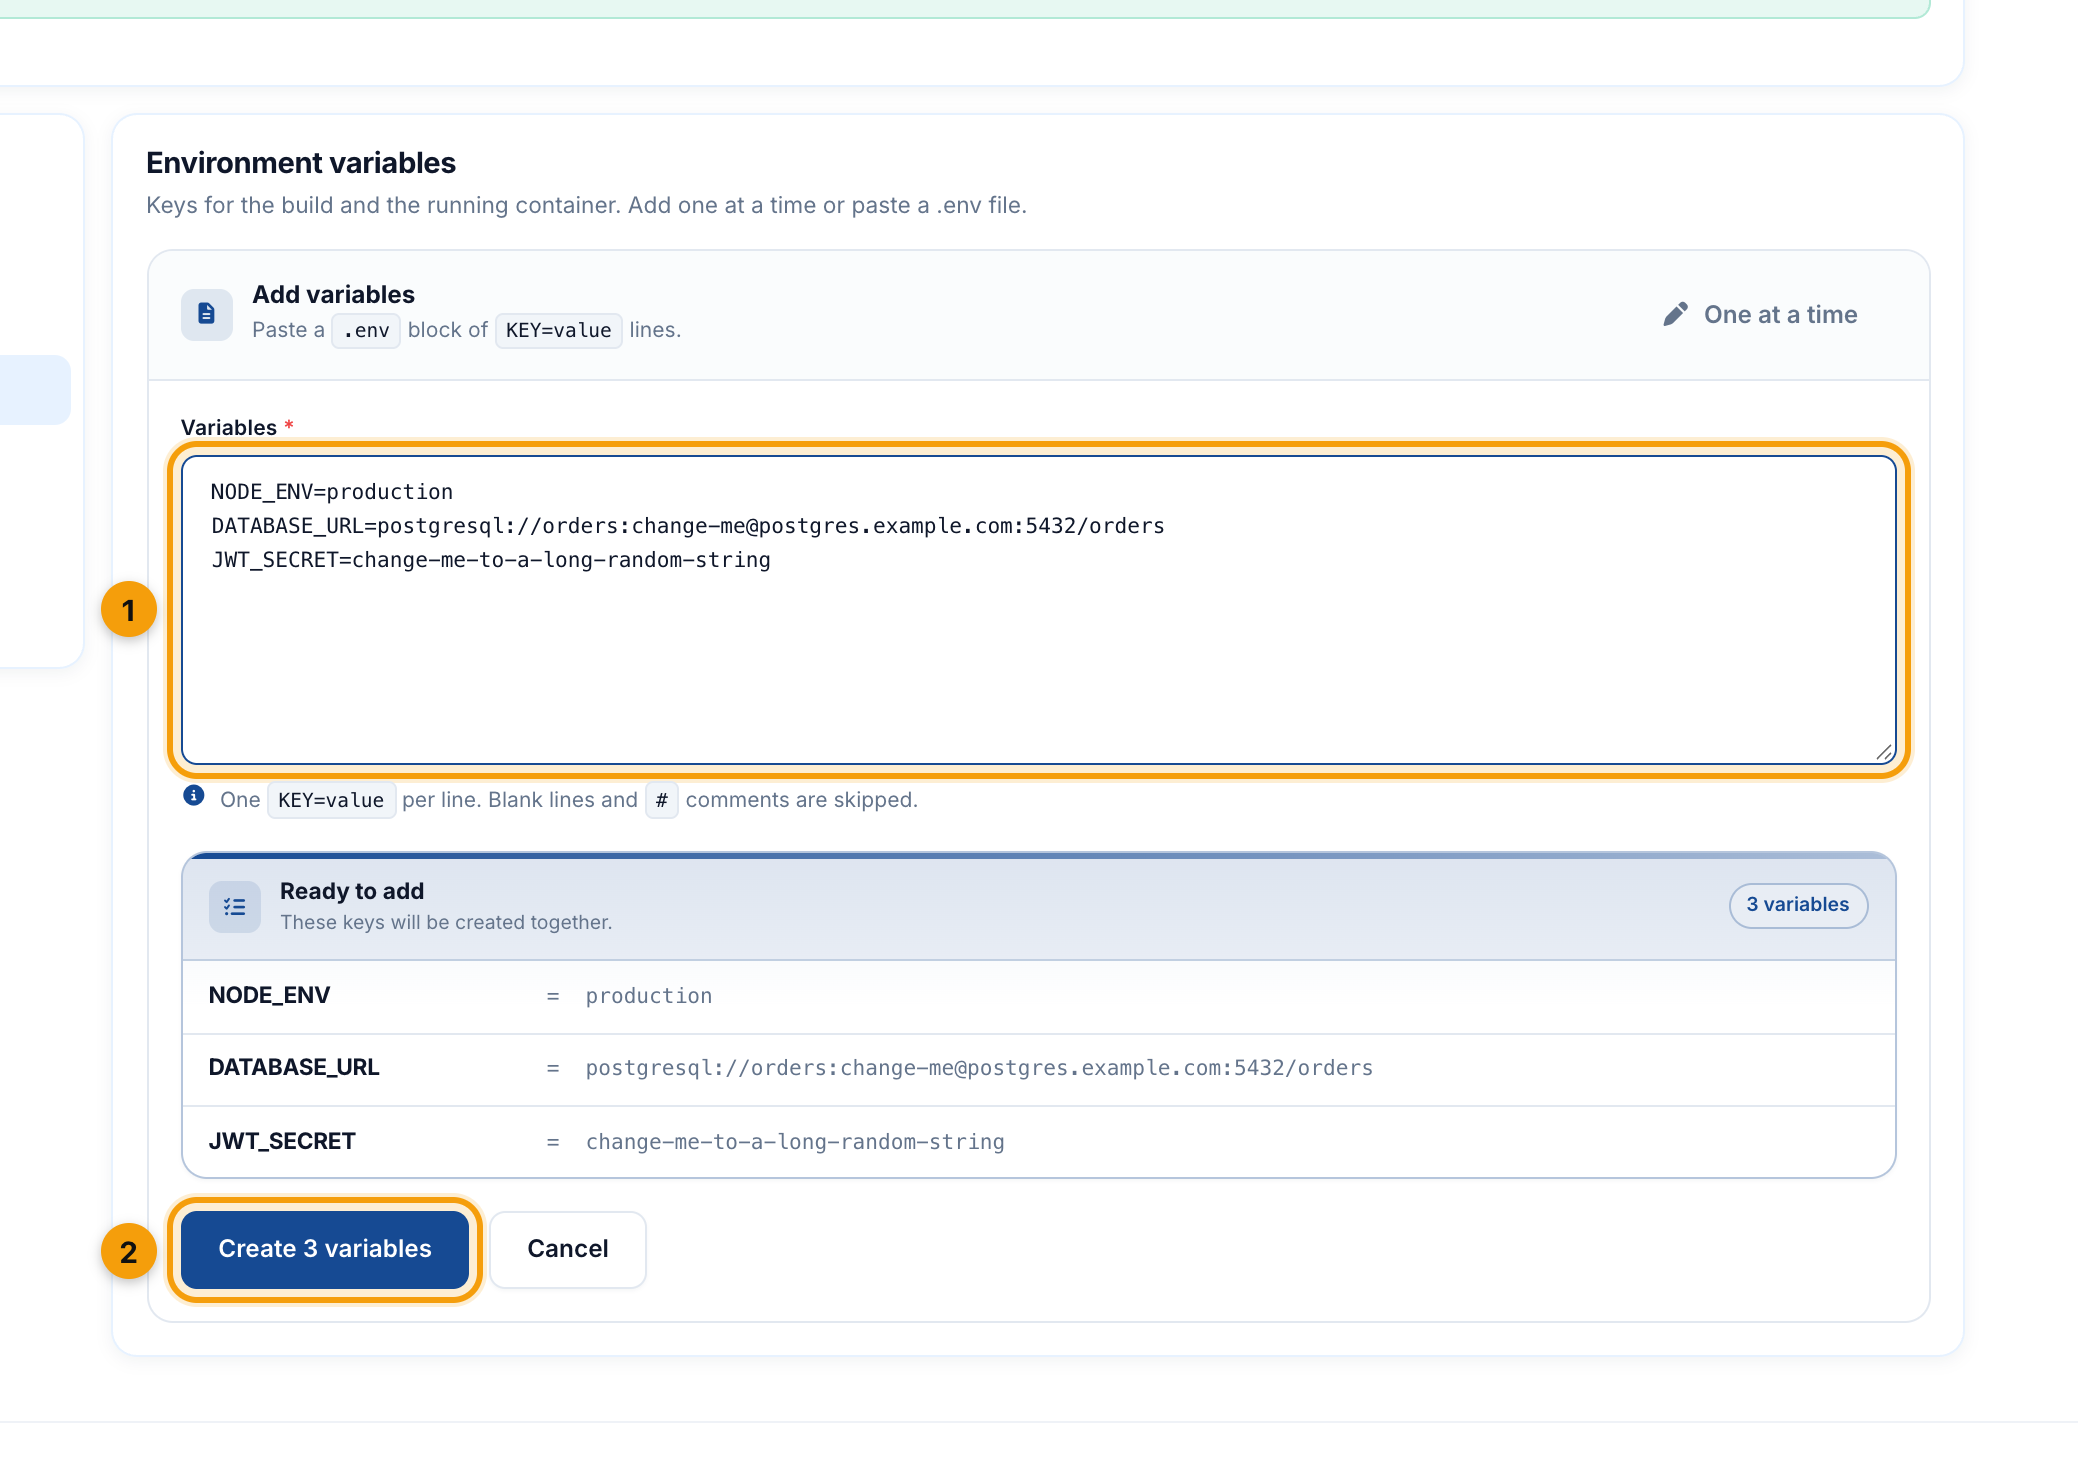
Your code reads them with process.env, for example process.env.DATABASE_URL. You don't need the dotenv package in production: Kubana sets the variables for you. Setting NODE_ENV=production makes Express and many libraries faster and quieter.
New variables show as pending until the next deploy:
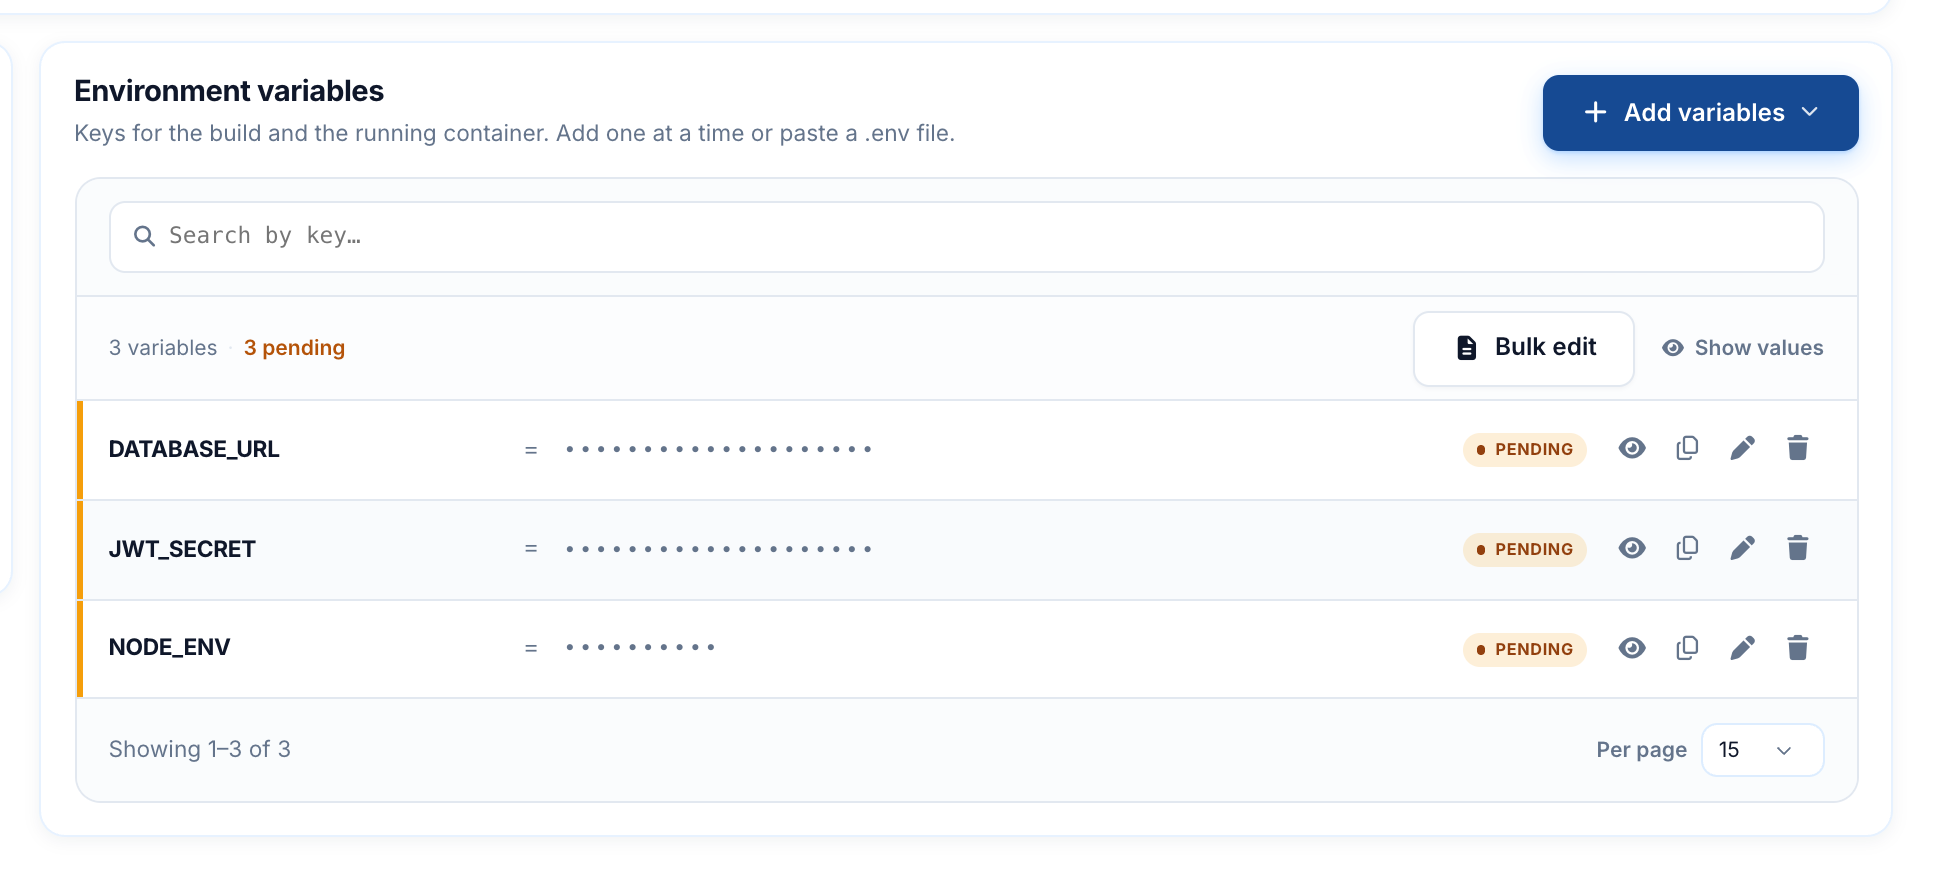
Your database must run outside the app, for example a managed PostgreSQL or MySQL service, or one on your own Kubana server. Keys named GIT_SSH_KEY_B64 or starting with KUBANA_ are reserved.
Step 5: Run your migrations on every deploy (optional)
If your app has database migrations, add the command in Configuration → Post-deployment commands (1), then Save commands (2). Use whatever your tool needs, for example npm run migrate, npx knex migrate:latest, npx prisma migrate deploy or npx sequelize-cli db:migrate.
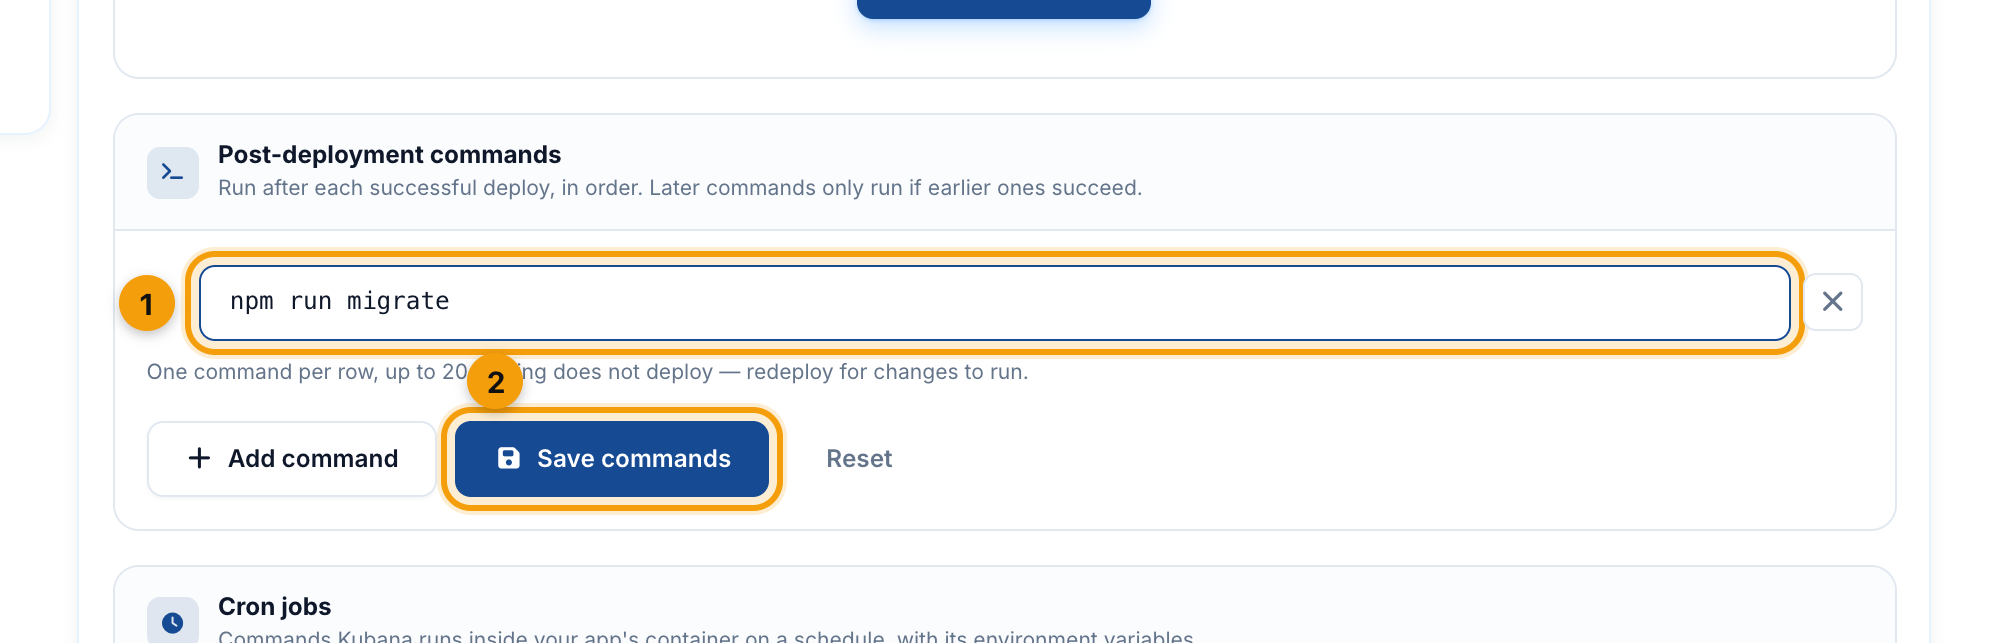
Commands run in order after each successful deploy, and Kubana never runs migrations on its own.
Step 6: Deploy
Choose Deploy at the top right of the app page and confirm.
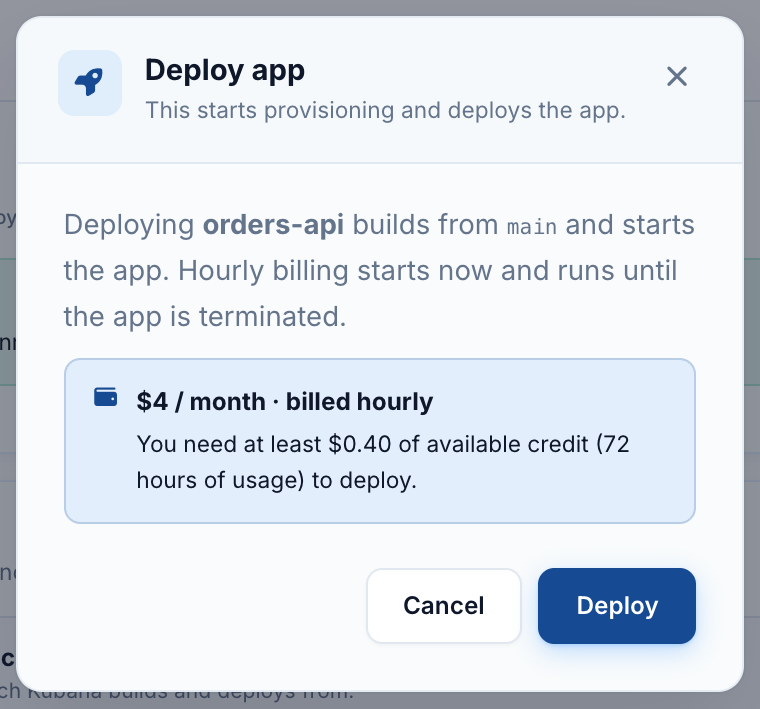
The status changes to Deploying. Under Deployments you can see the commit being built. A deploy usually takes one to two minutes, and the page refreshes by itself.
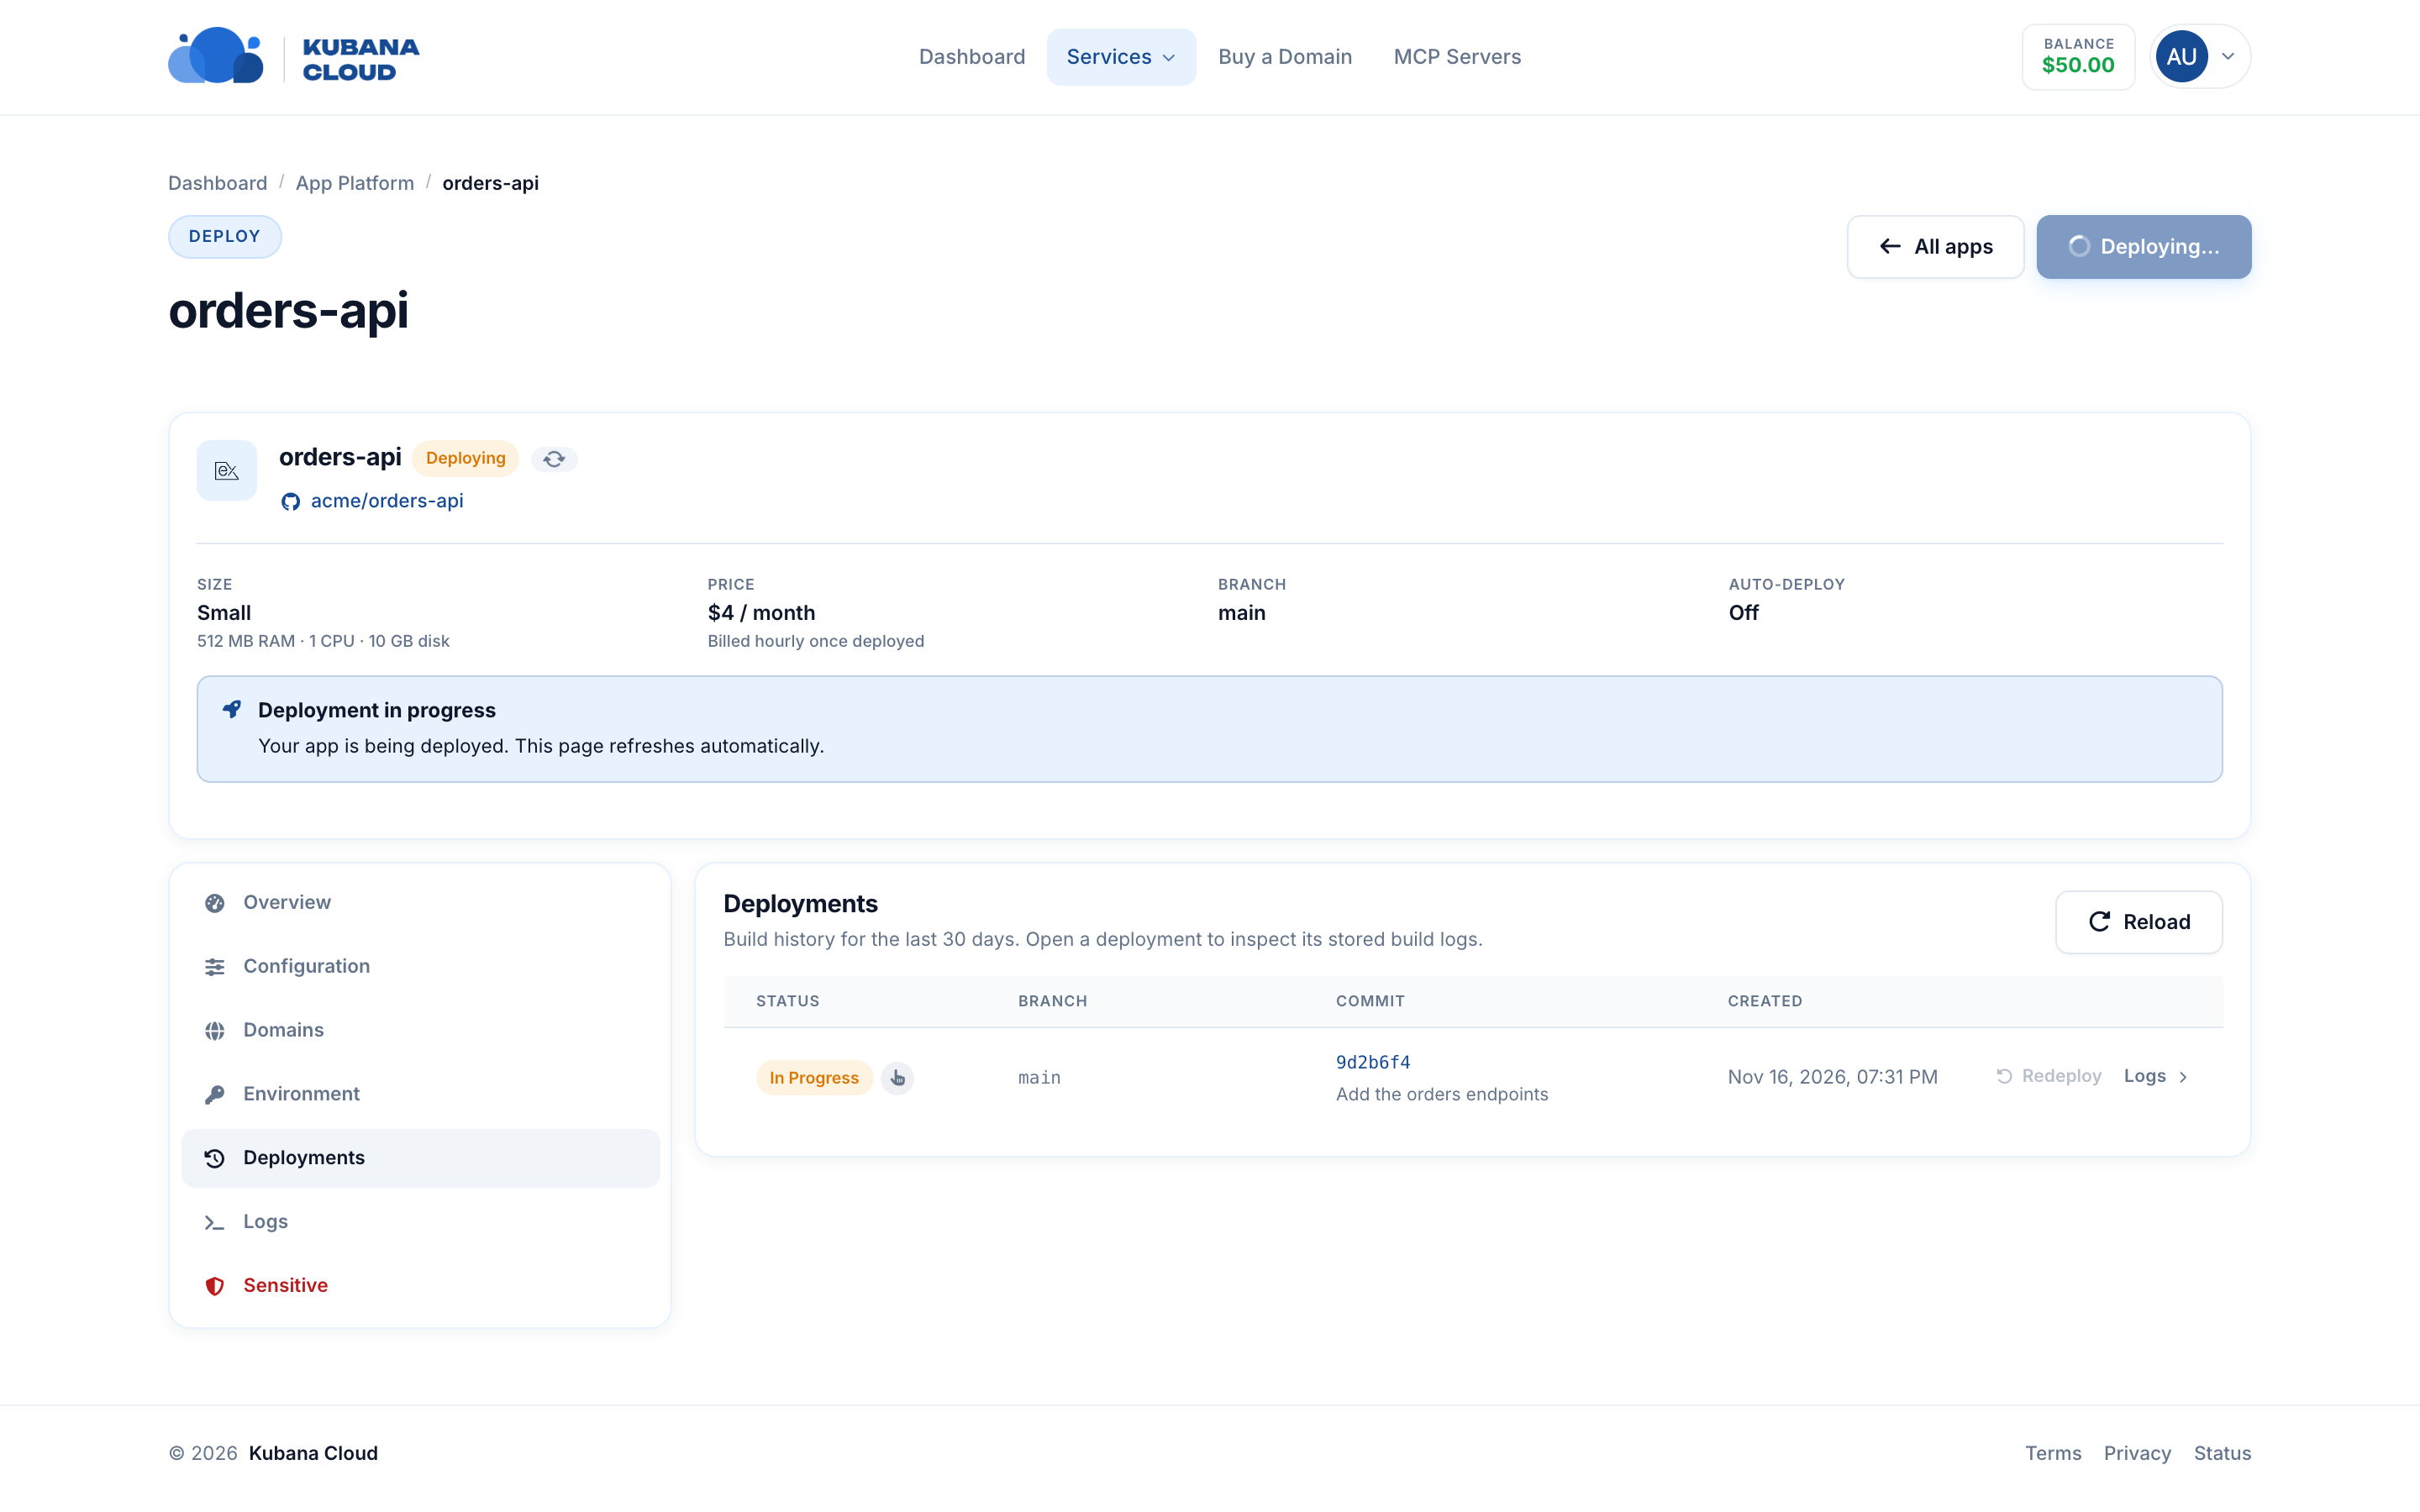
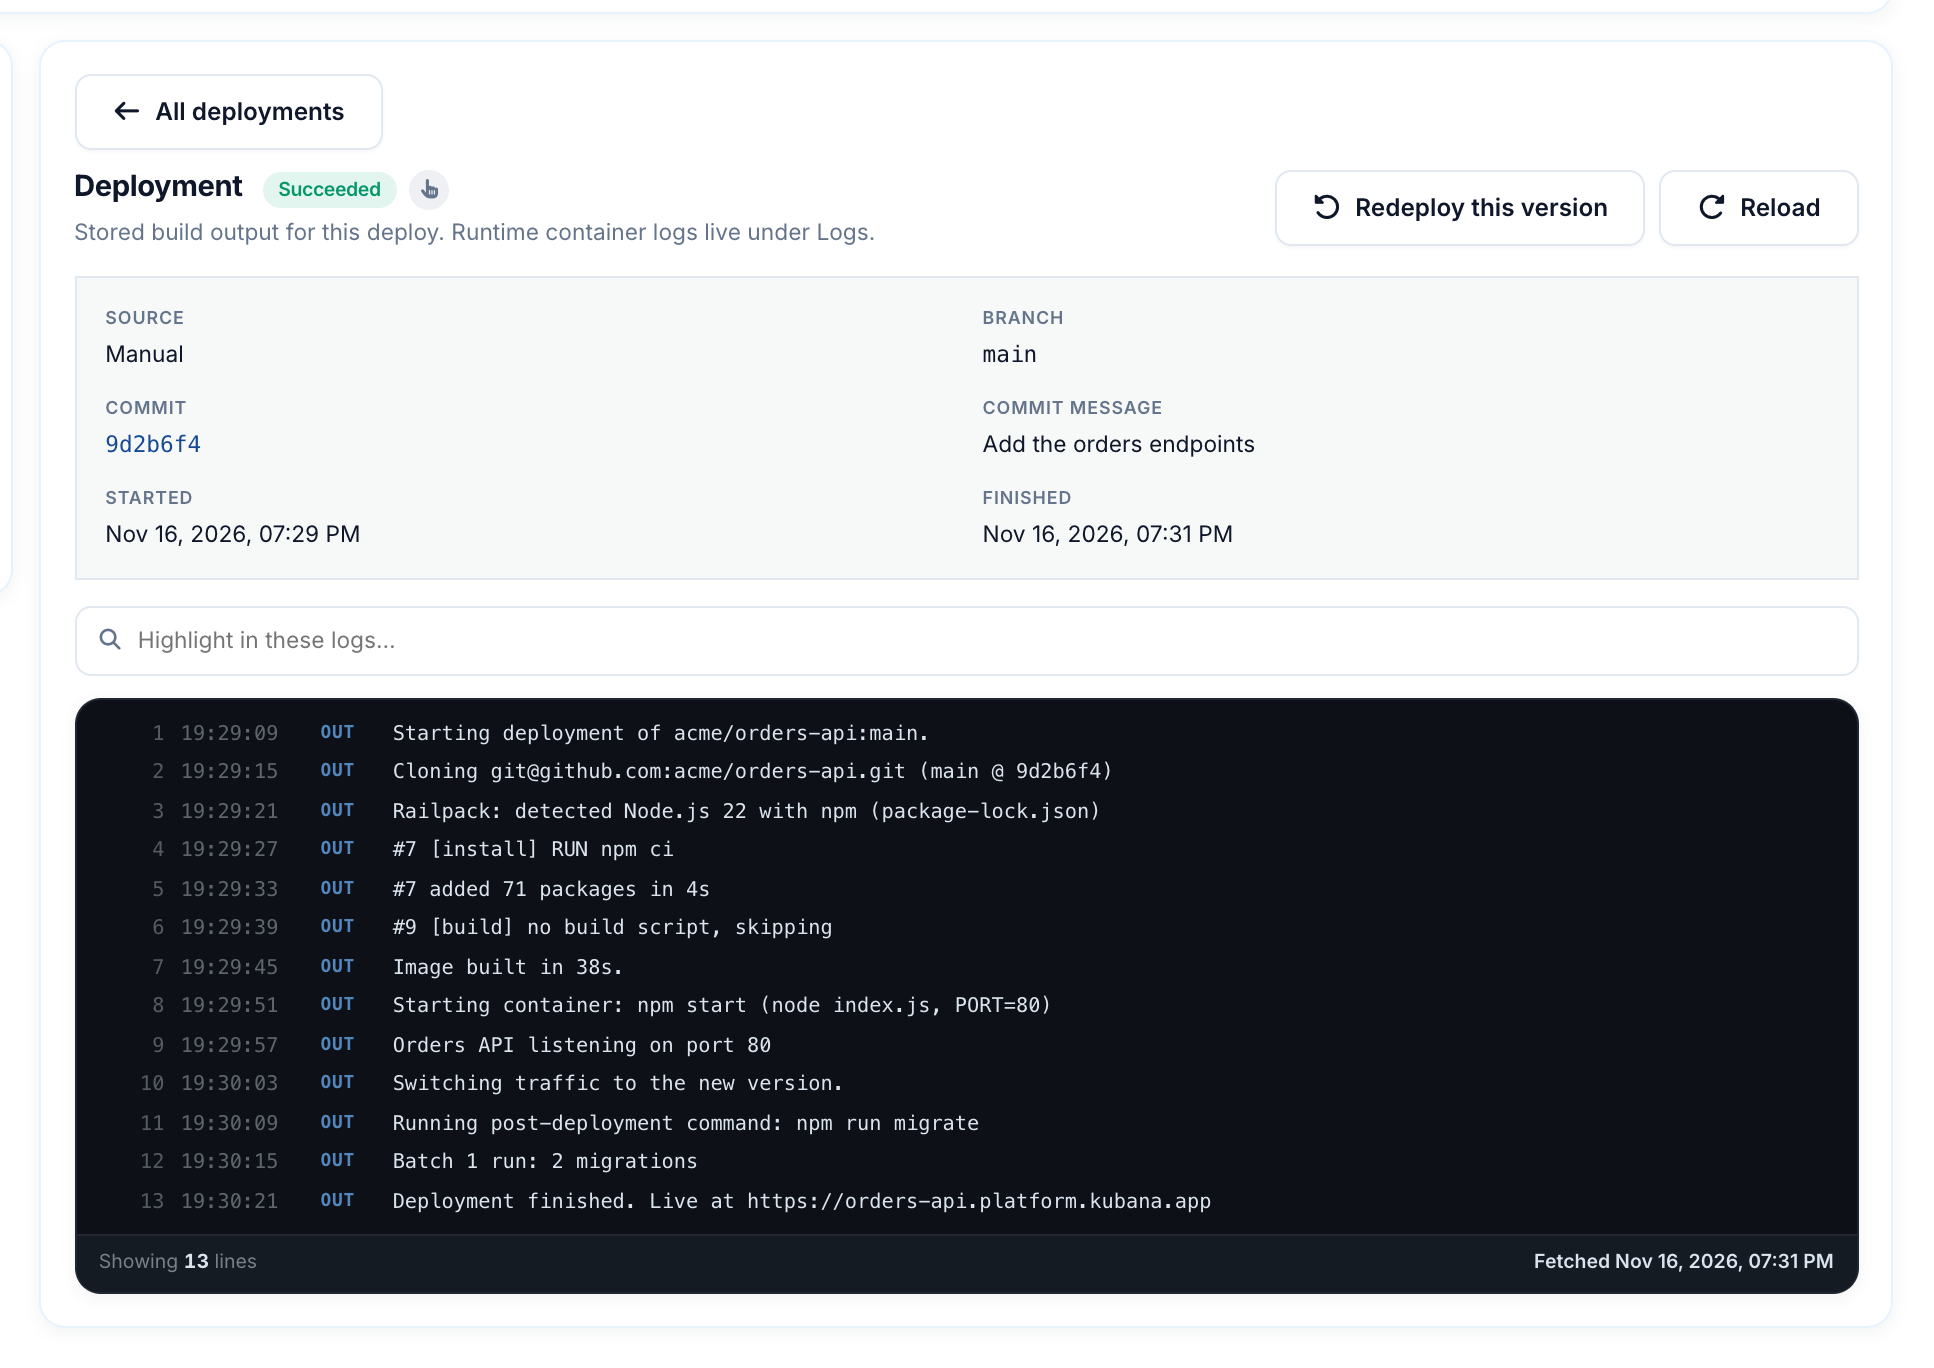
Behind the scenes Kubana clones your branch, installs your packages, runs your build script if you have one, starts your app with npm start, switches traffic to it, then runs your post-deployment commands.
Step 7: Call your API
When the status is Active, your public address appears next to the repository name. Copy it and try it:
curl https://orders-api.platform.kubana.app/health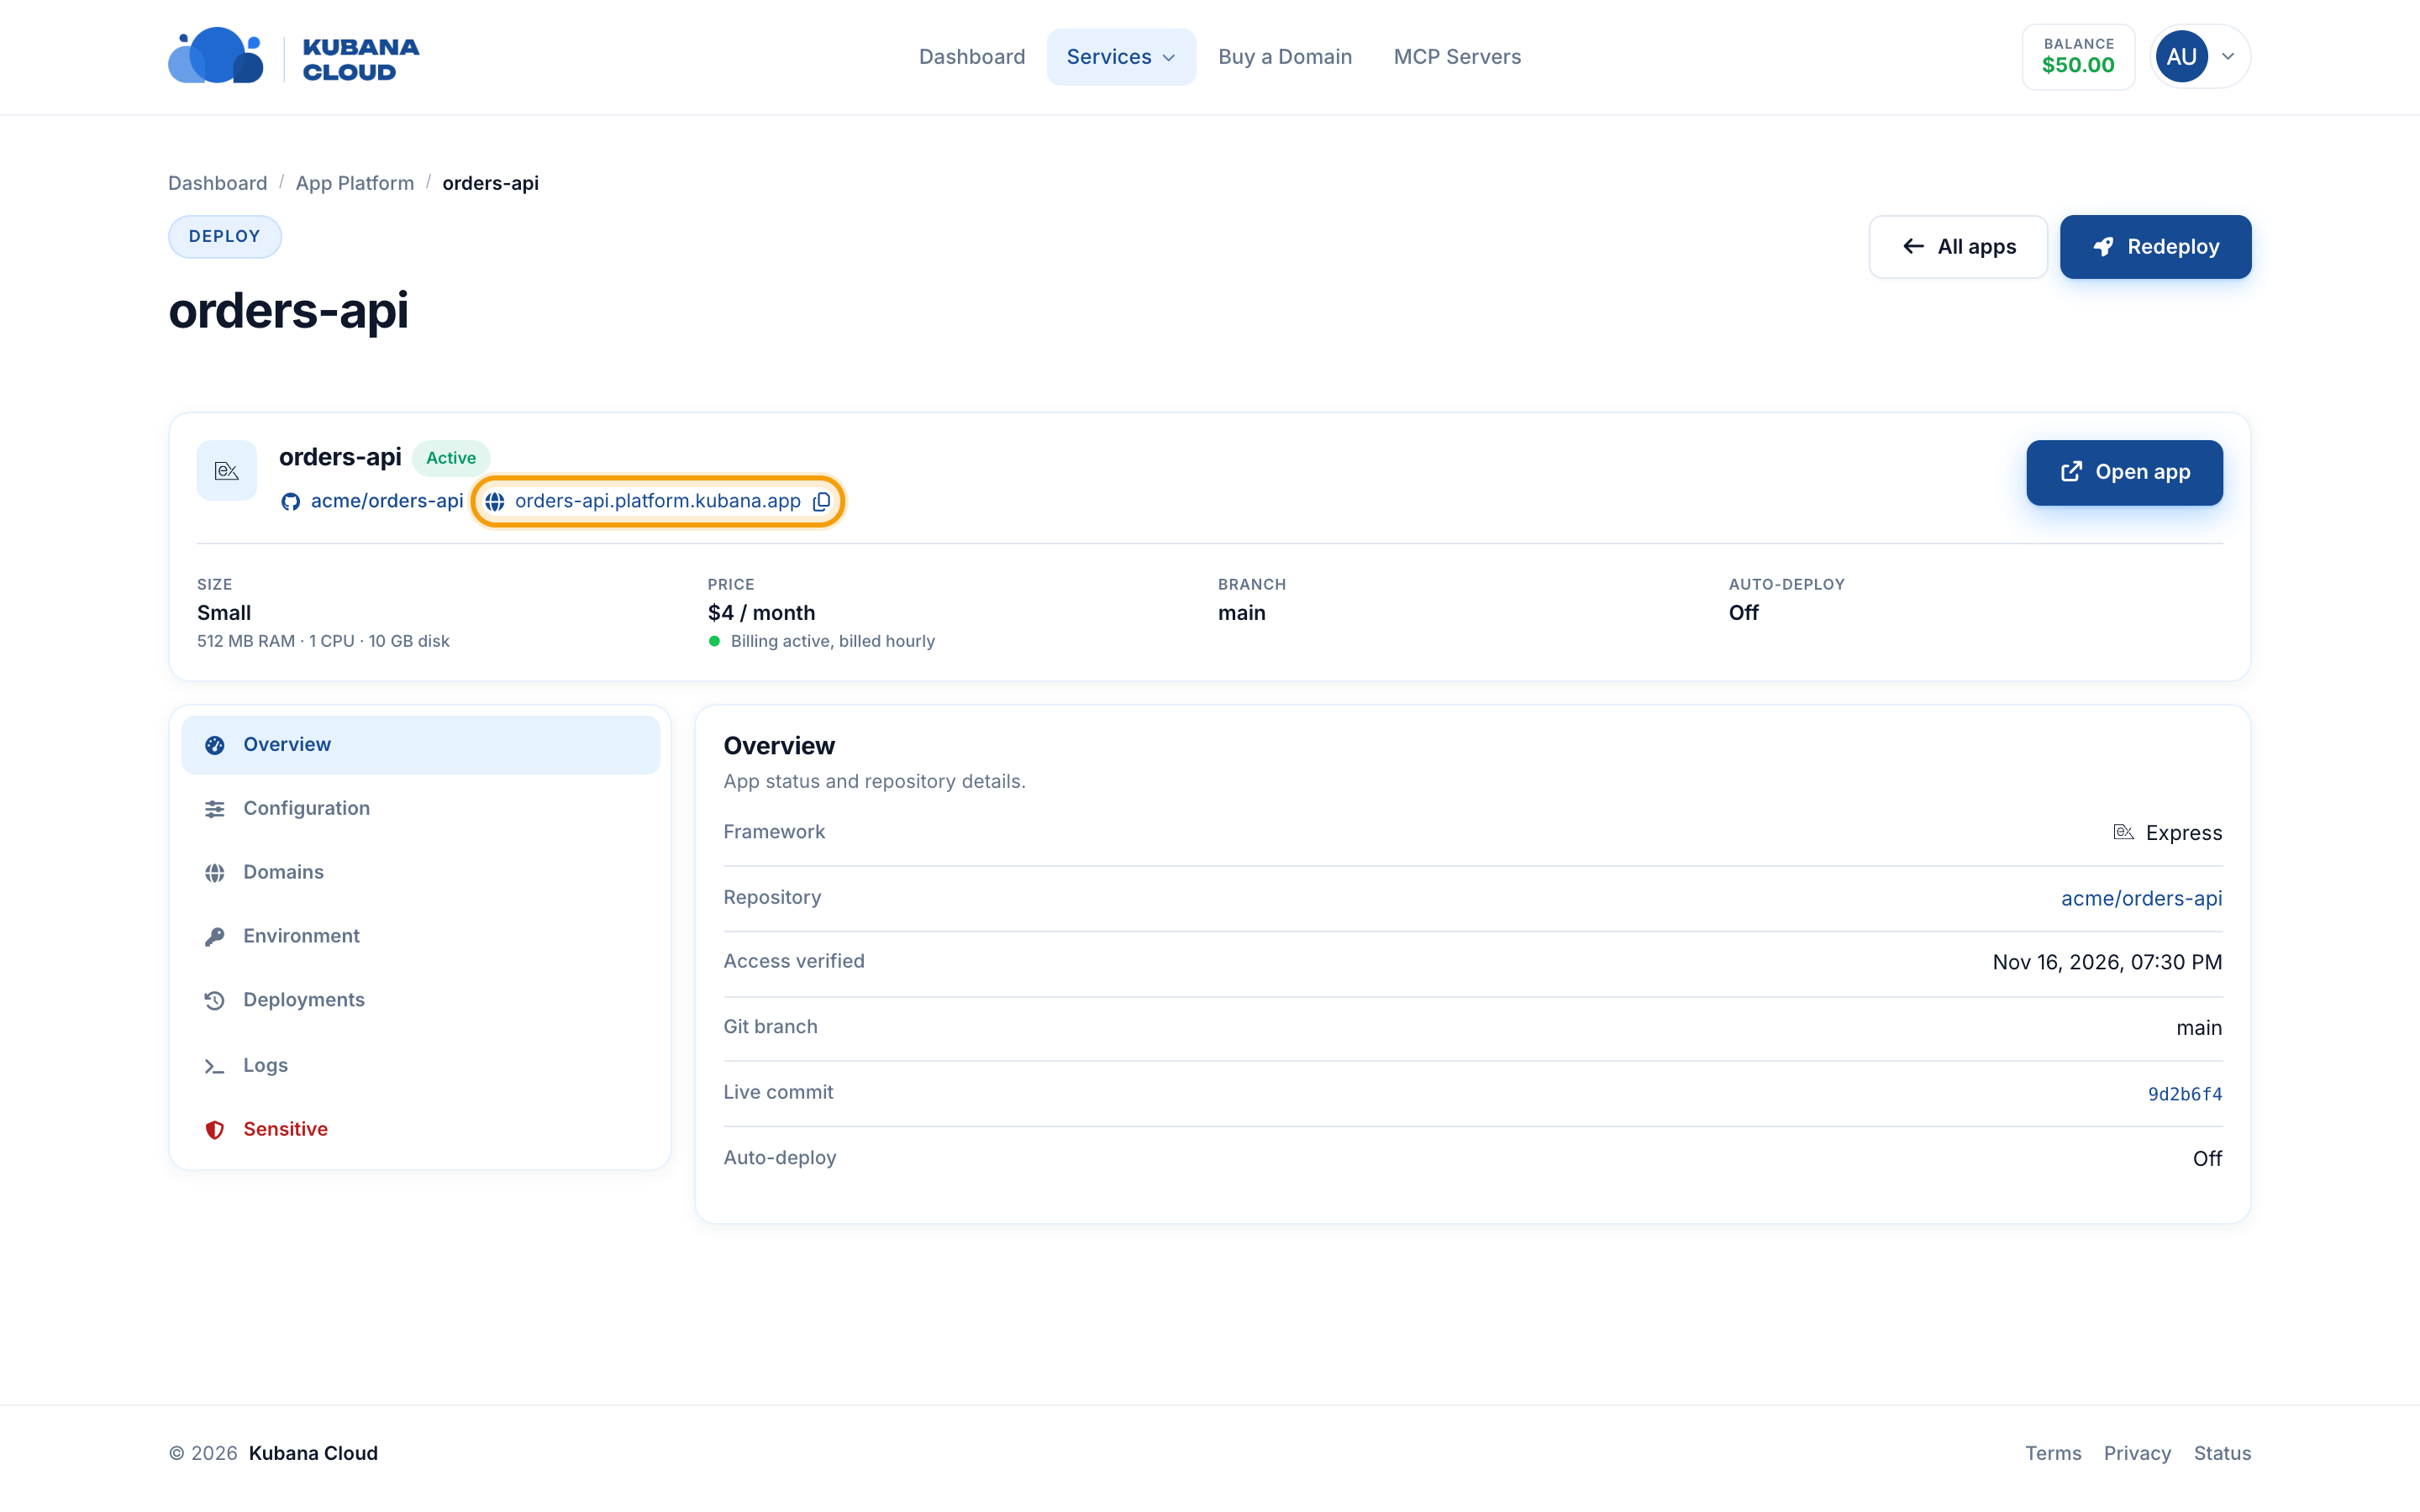
Your API is live. The overview also shows the live commit, which is the exact version that is running.
Note: On a brand new app, the HTTPS certificate can take a few minutes to be issued. If you get a certificate error, wait a moment and try again.
Where to look when something is off
Deployments → Logs shows the build log: the install, your build if any, and the start of your app.
Logs shows what your running app prints: your
console.logoutput and, with a request logger such asmorgan, every request.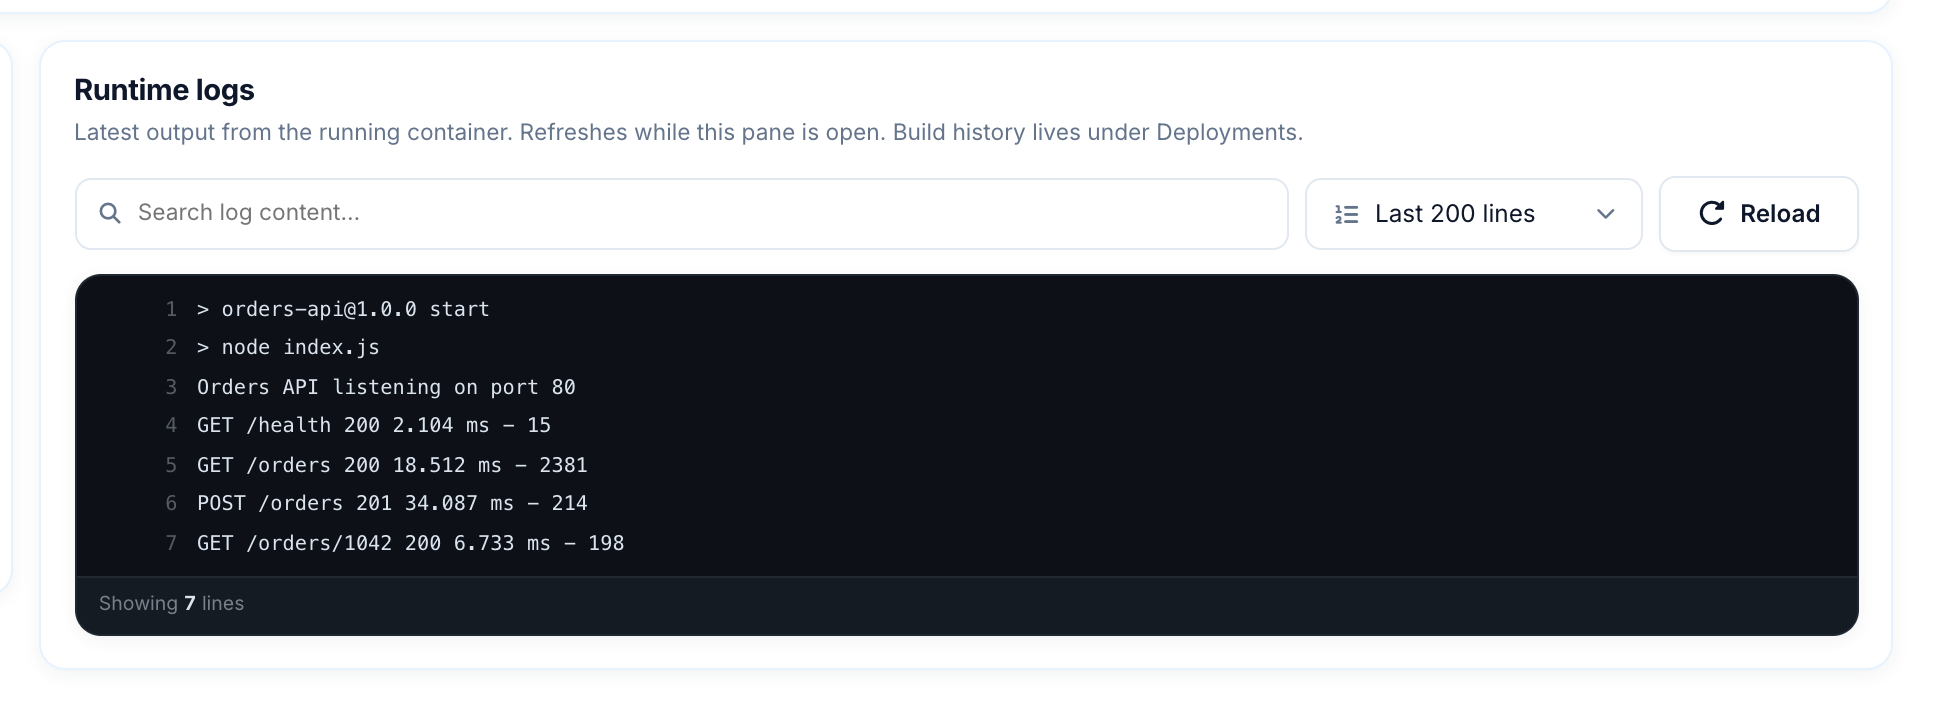
Part 2: Make it a real app
Each section below is optional and stands on its own.
Run a script on a schedule (cron jobs)
To expire old orders every night or send a daily report, open Configuration → Cron jobs → Add cron job:
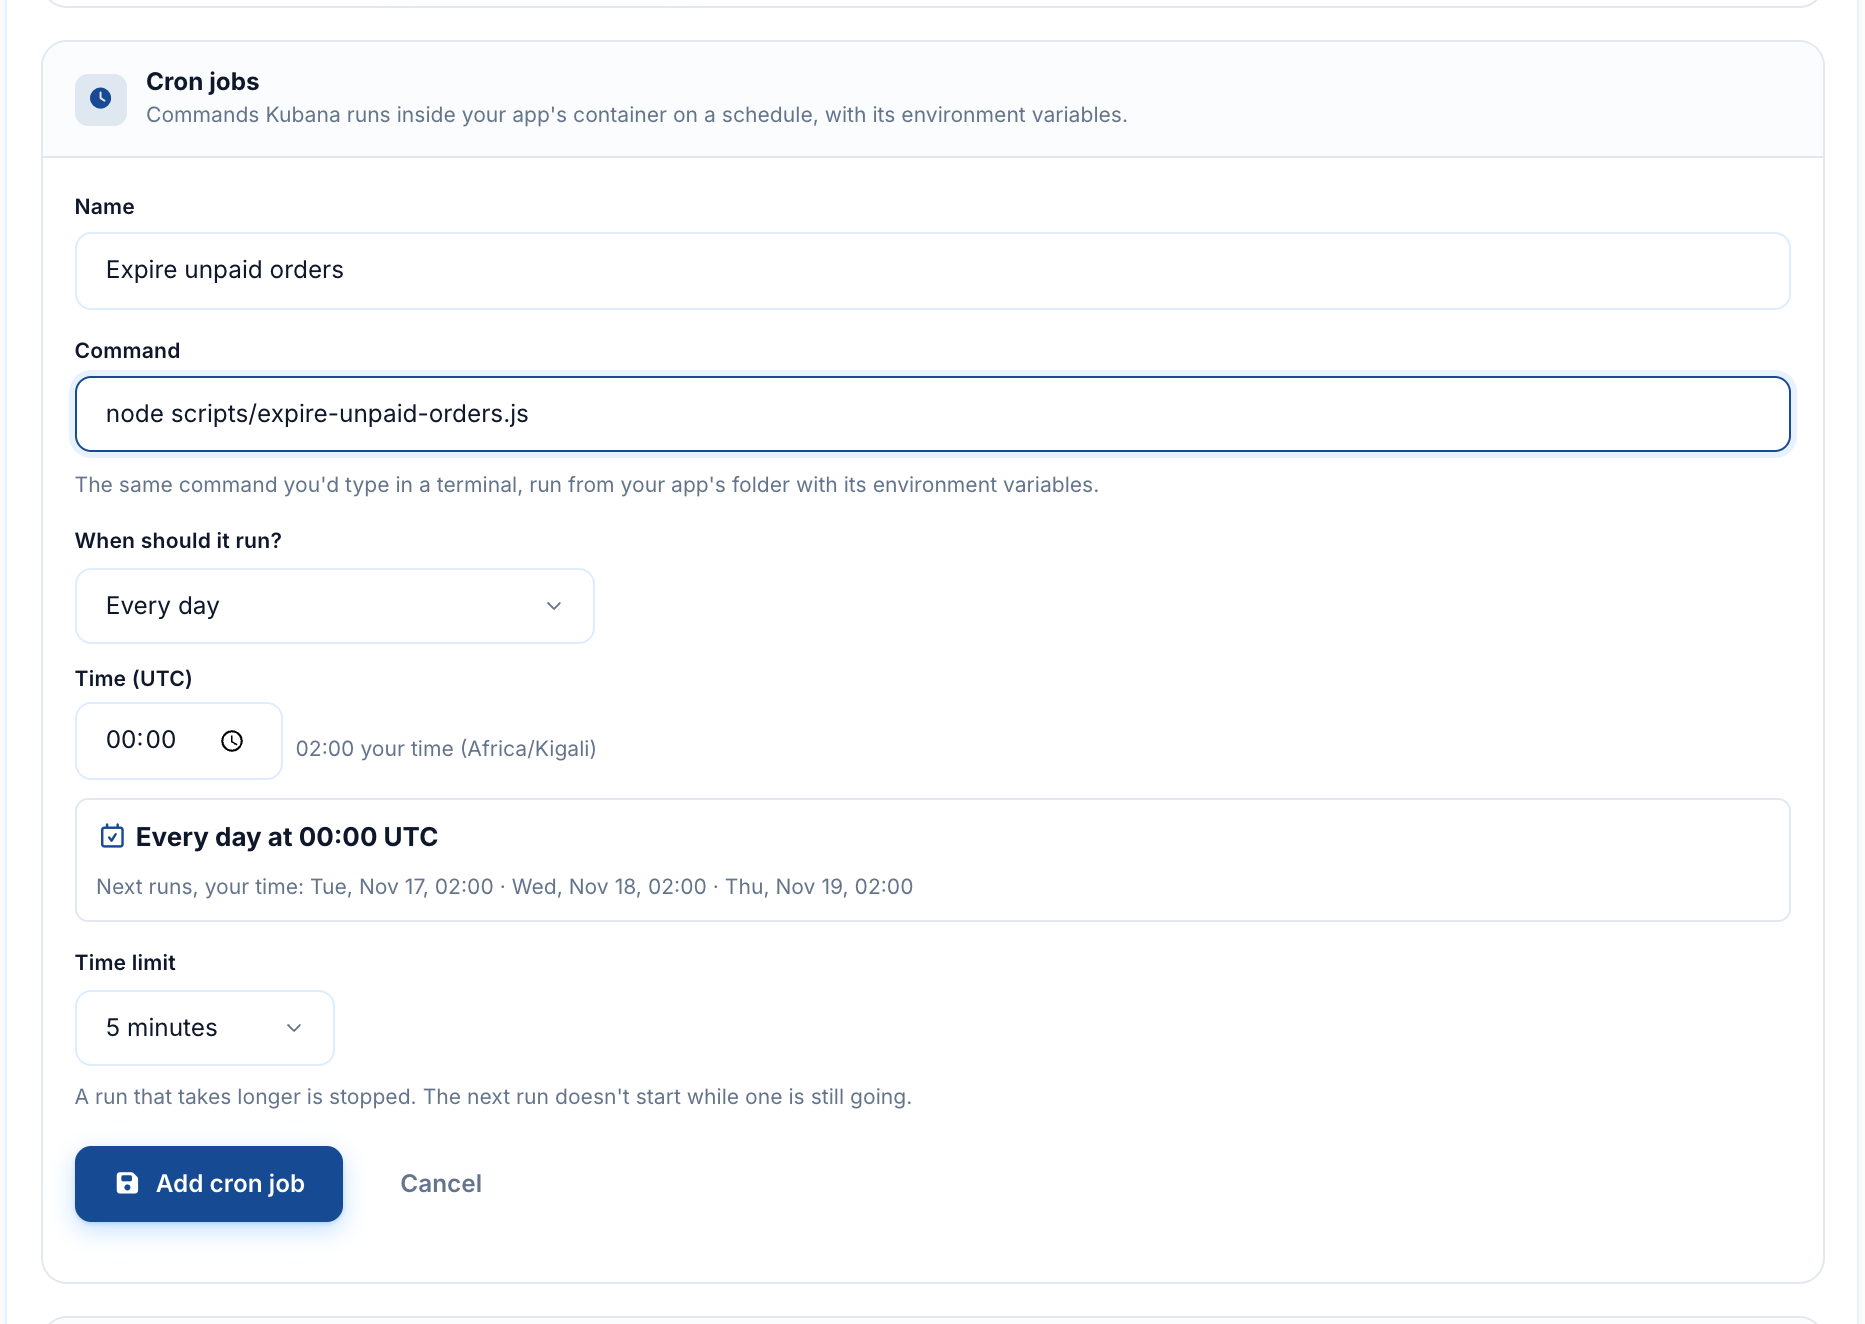
- Command: for example
node scripts/expire-unpaid-orders.js. It runs in your app's folder, with your environment variables. - When should it run? Pick it in plain words (every hour, every day at 02:00…) or type a cron expression. Times are in UTC, and the form shows your local time next to them.
- Time limit: a run that takes longer is stopped (5 minutes by default).
On a running app, a new cron job starts right away.
Deploy automatically on every push
On Configuration → Auto-deploy, turn the switch on and confirm.
Choose Show GitHub webhook details, and copy the Payload URL and the Secret.
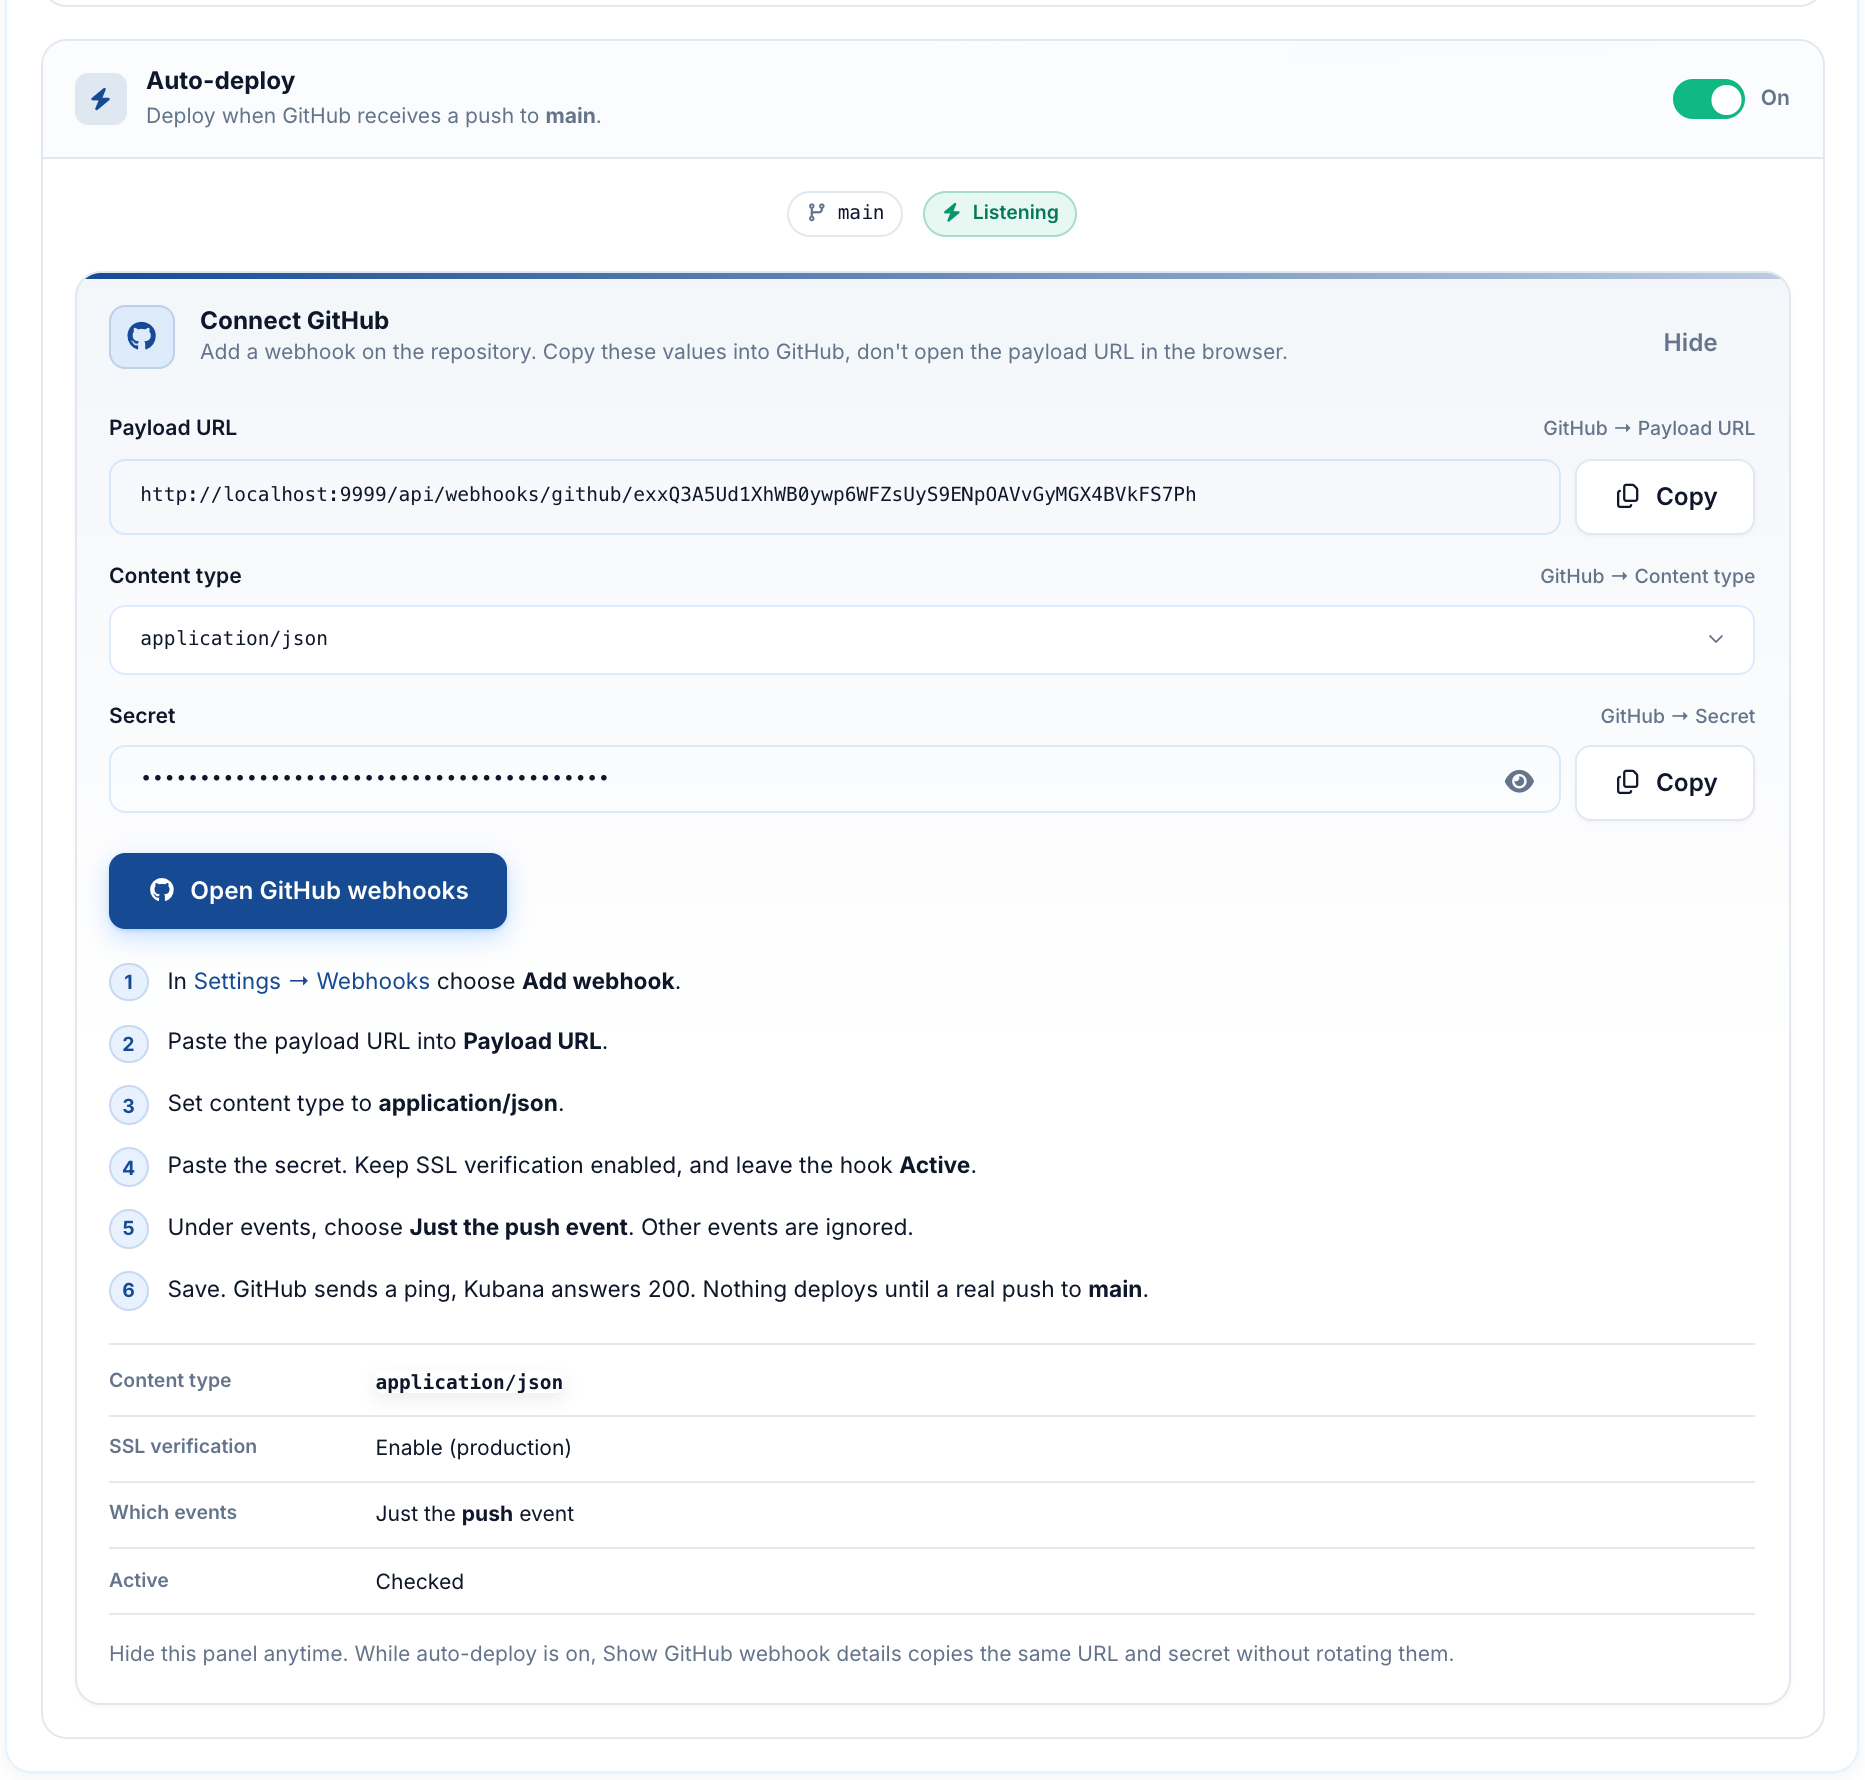
In GitHub, open your repository → Settings → Webhooks → Add webhook. Paste the payload URL, set Content type to
application/json, paste the secret, and choose Just the push event. Save.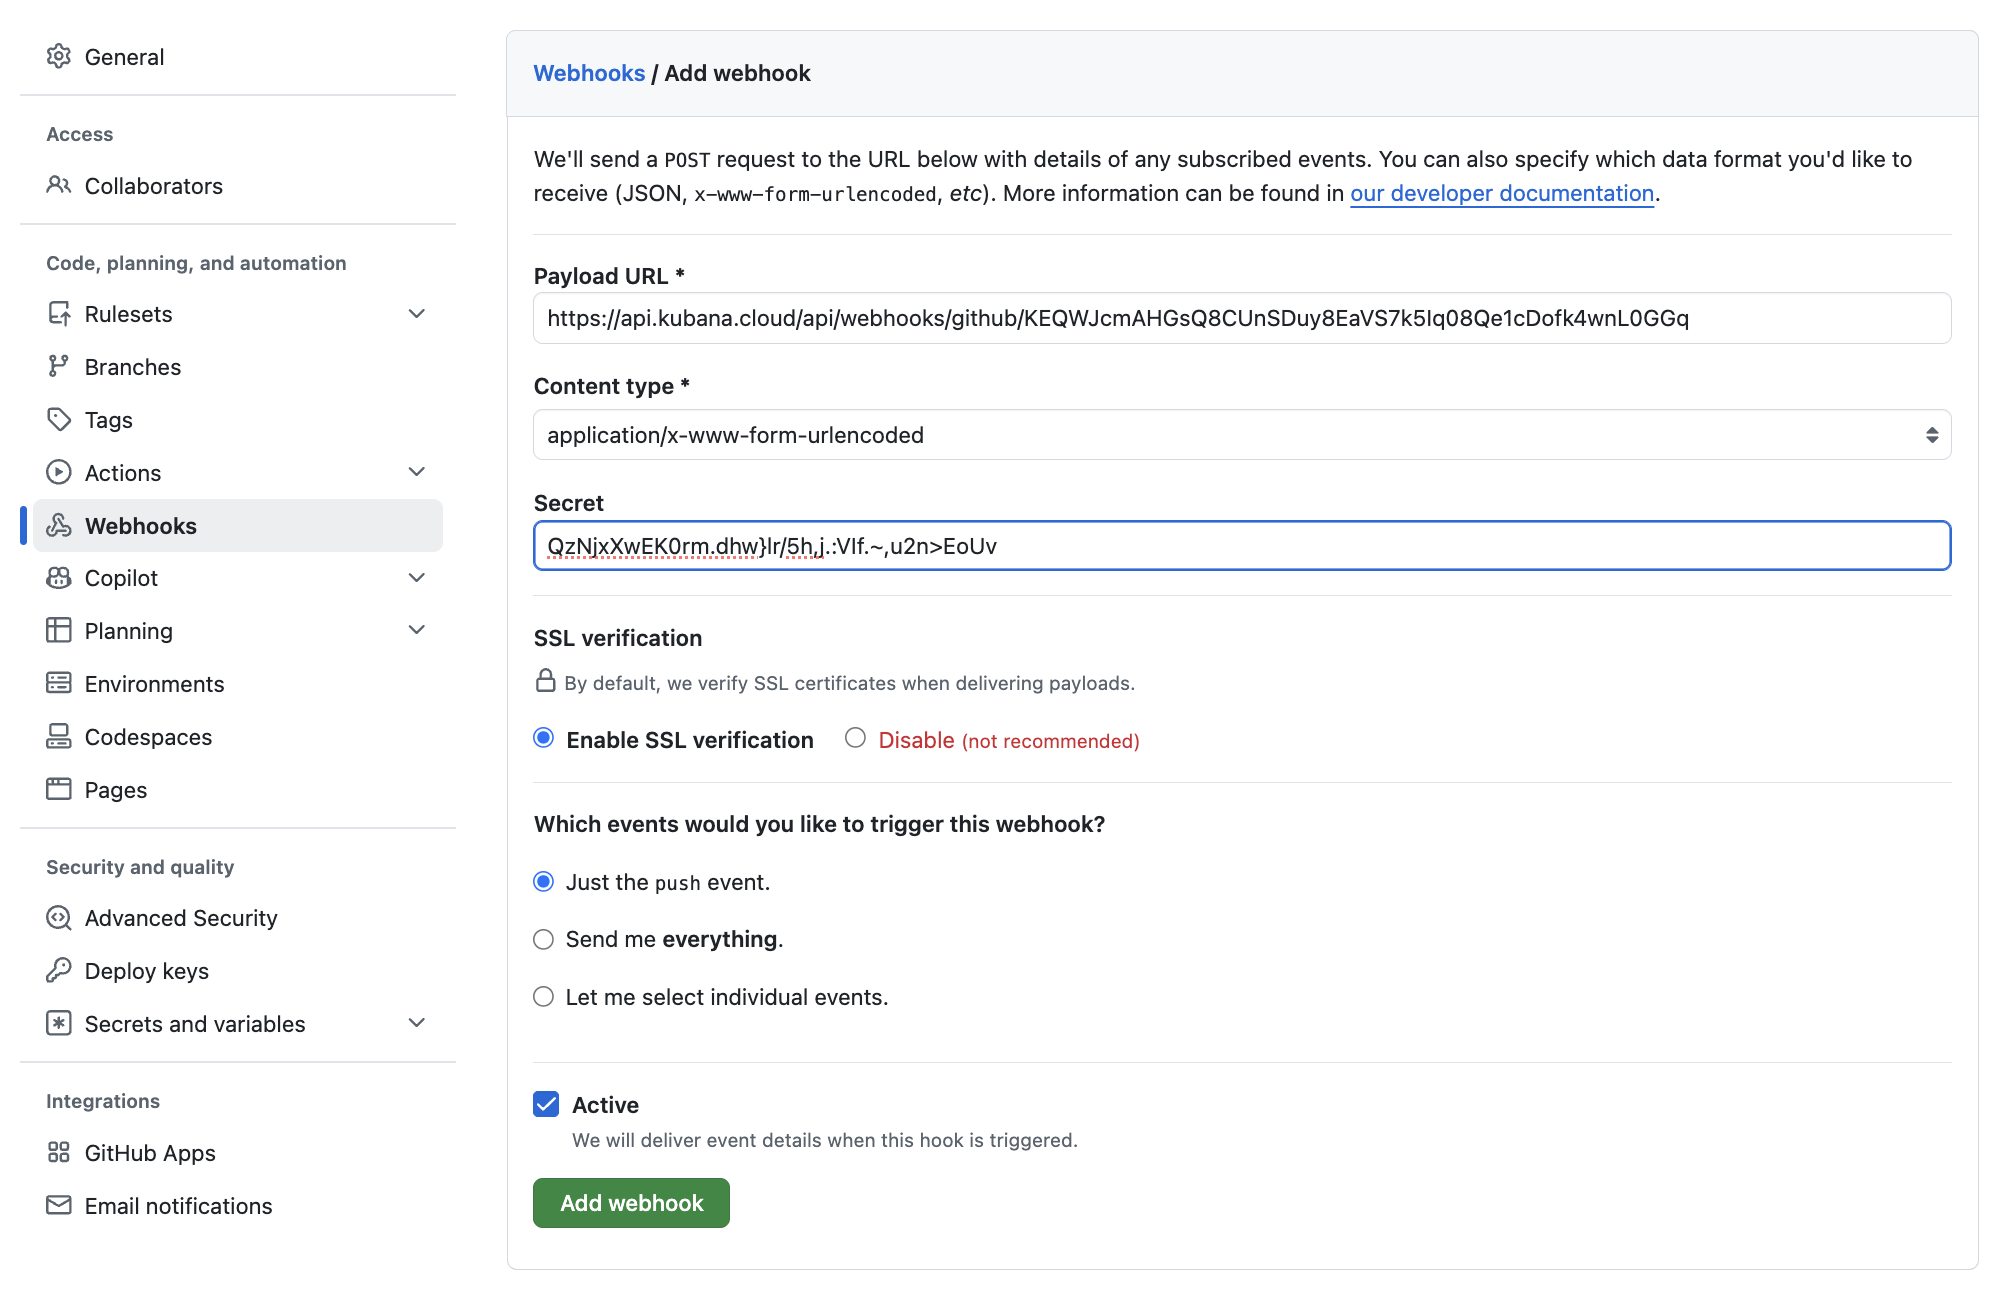
From now on, git push to your branch starts a deployment, labelled Auto deploy in Deployments.
Use your own domain
Every app gets a *.platform.kubana.app address. You can also attach up to five of your own domains, and HTTPS is set up for you.
First, at your DNS provider (or in Kubana DNS Management), point the domain at Kubana:
Type Host Value Required A @or your subdomain, e.g.api62.238.7.246Yes AAAA @or your subdomain2a01:4f9:c015:ef6::1Optional (IPv6) Then, in Domains, choose Add domain, enter the hostname (for example
api.example.rw) and attach it. Kubana checks the DNS records, then issues the certificate within a few minutes.Optionally make it the primary domain, so it becomes the app's main address.
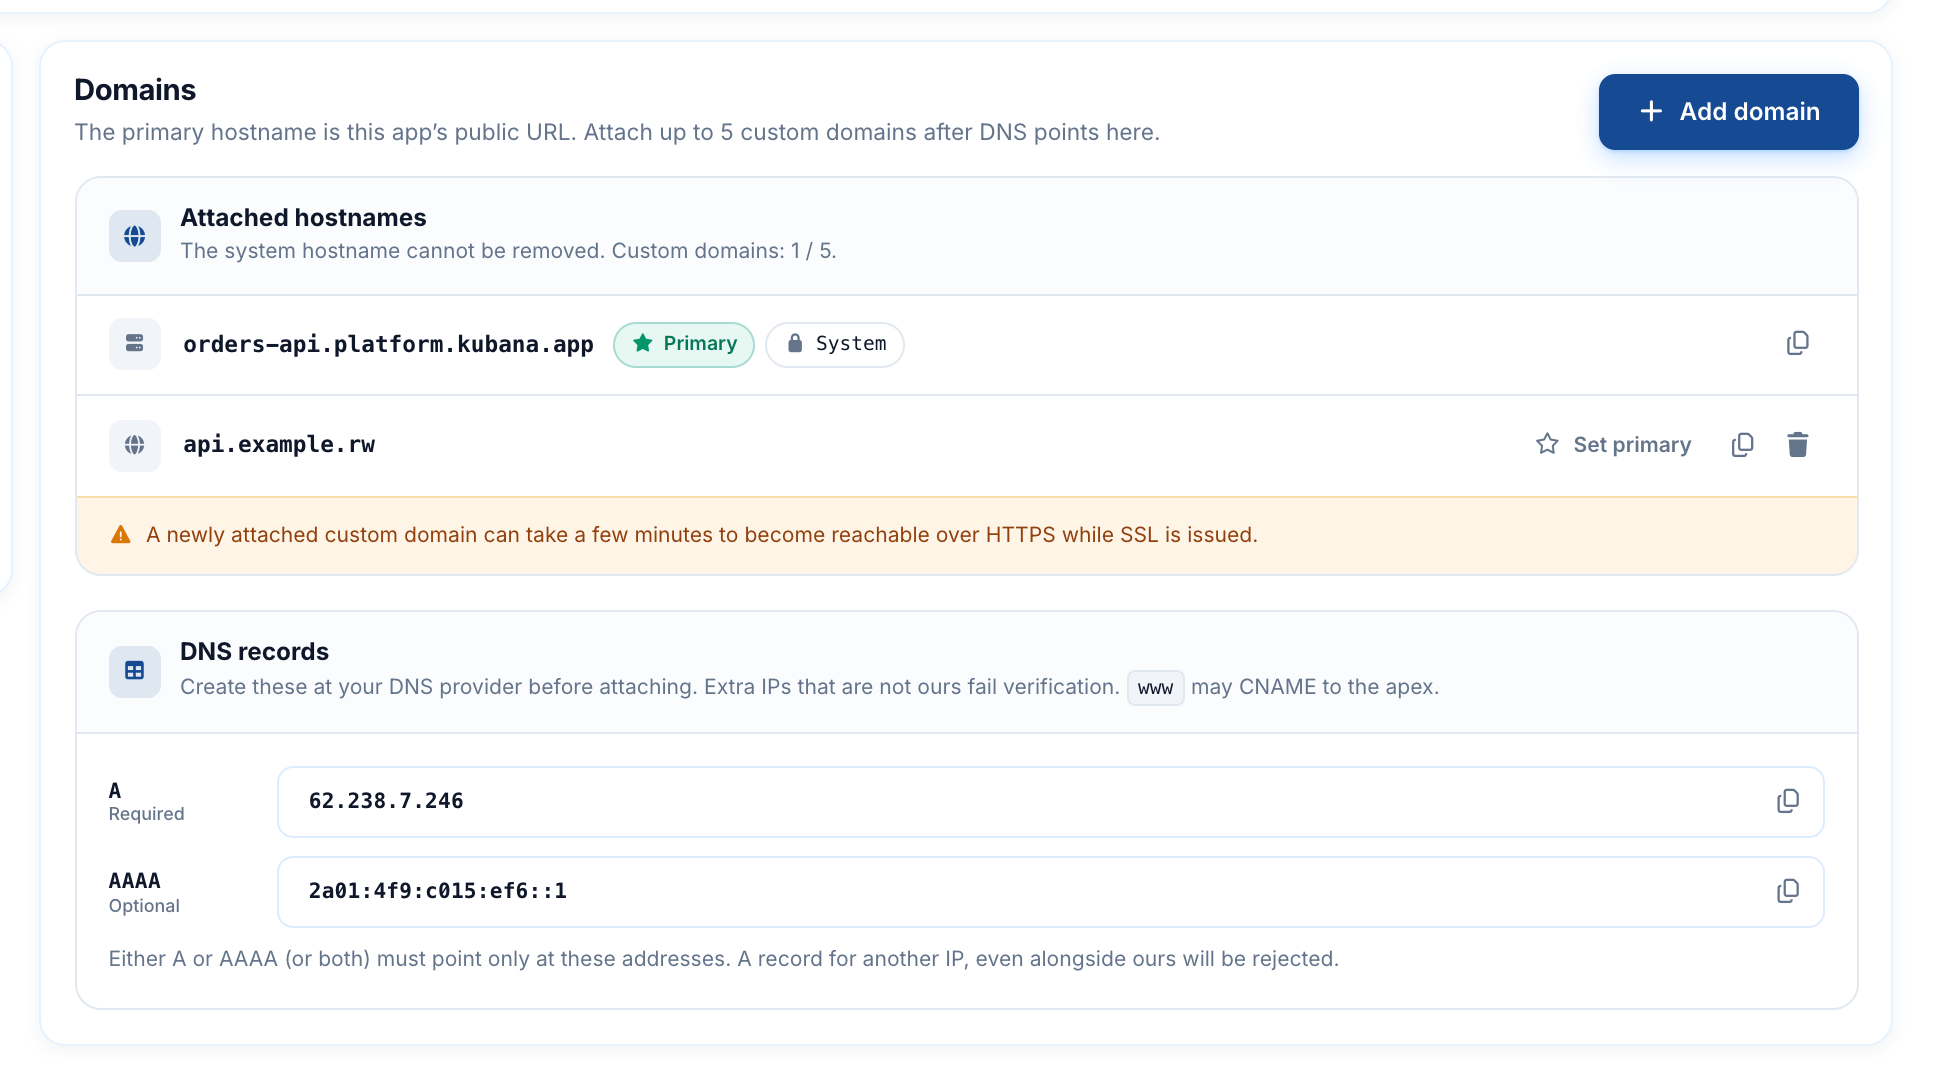
Extra A or AAAA records that point somewhere else make verification fail. Remove them first. If a browser app calls your API from another domain, allow that domain with the
corspackage.
Part 3: Do it all by asking your AI assistant
Everything in this guide can also be done by asking an AI assistant. Kubana runs an App Platform MCP server: connect it once to Claude, ChatGPT, Claude Code, Codex, Cursor or VS Code, and your assistant can create, configure, deploy and debug your apps for you, with your account's permissions.
Connect it (about one minute)
In your assistant, add a custom connector (or MCP server) with this URL:
https://api.kubana.cloud/mcp/app-platformClaude users can also install it from the Claude directory. Setup steps for each assistant are on the MCP page.
Your browser opens Kubana. Sign in, then choose Authorize. You don't need an API key.
Then just ask
Create an Express app called orders-api from github.com/acme/orders-api, Small size, in my Orders project.
The assistant creates the app and gives you the deploy key. Add it on GitHub as in Step 2, then:
I've added the key. Use the main branch, add the variables from this .env, run npm run migrate after each deploy, then deploy it.
More ideas:
- "Run
node scripts/expire-unpaid-orders.jsevery night at 1 am my time." - "Turn on auto-deploy for orders-api." The assistant gives you the webhook URL and secret to paste in GitHub.
- "Attach api.example.rw and make it the primary domain."
- "My last deploy failed. Read the build log and tell me why."
- "Show me the errors in orders-api's logs from the last few minutes."
You stay in control
- Risky actions ask you first. Actions that cost money, take an app offline or touch secrets need a 6-digit code that Kubana emails you. Choose which actions need a code under MCP Servers → Approval policy. See approval codes.
- GitHub stays yours. The assistant can't touch your GitHub account, so you add the deploy key and the webhook yourself.
- Same prices, same limits. Connecting is free.
- Revoke at any time under MCP Servers → Connections.
Updating and rolling back
- New code: push to your branch (with auto-deploy) or choose Redeploy.
- New environment variables, branch or post-deployment commands: save them, then Redeploy. Saving alone doesn't change the running app.
- Something broke? In Deployments, open an earlier deployment and choose Redeploy this version. Kubana rebuilds that exact commit. Your Git history is untouched, so fix the code, then push again.
Troubleshooting
| What you see | Why it happens | What to do |
|---|---|---|
| Verification of the deploy key fails | The key is on another repository, or wasn't saved | Add it to the repository you entered at creation. Read-only is fine. |
| Bad gateway after a successful deploy | The app doesn't listen on the port Kubana gives it | Use app.listen(process.env.PORT || 3000), and remove any PORT variable you added in Environment. |
| The deploy fails with Missing script: "start" | package.json has no start script |
Add "start": "node index.js" (or your entry file). |
| The deploy fails during the install | The lock file doesn't match package.json, or a package needs a build step that fails |
Run npm ci on your computer, commit the updated lock file, push. |
Cannot find module at startup |
The file in your start script doesn't exist, often because TypeScript wasn't compiled |
Check the path in start. For TypeScript, add a build script and start the compiled file. |
req.ip is always the same, or req.secure is false |
Express doesn't trust the HTTPS proxy in front of it | Add app.set('trust proxy', 1). |
| Uploaded files disappear after a deploy | The app's disk is replaced on every deploy | Keep uploads in S3-compatible storage and data in your database. |
| The app restarts under load | Not enough memory | Move to the Standard size. |
| The deploy is refused for insufficient credit | Your balance doesn't cover 72 hours of the size | Top up your credits, then deploy again. |
Costs at a glance
- Billing is hourly from your credit and starts at the first deploy. The price is locked at that moment.
- A stopped app is still billed. A terminated app is not.
- The dashboard always shows the live price before you create an app.
When you no longer need an app, go to Sensitive → Terminate, then Delete if you want to remove it completely.
Conclusion
You took an Express API from GitHub to a live HTTPS address with one line of code changed: Kubana installed your packages, started your app on the right port and ran your migrations. From here you can schedule cron jobs, deploy on every push, use your own domain, or let your AI assistant do it for you.
Next steps:
If a deploy fails and the logs don't explain why, contact support from the dashboard. We read every message.